Tuesday, August 31, 2010

Khandvi


I had wanted to learn making khandvis for a long time. Though I have recipe in cookbooks and have known how they look from a favourite eatery's menu, I was apprehensive trying them on my own. I discussed this with a friend here. She has lived in Mumbai a long time and has friends from various states of India, having worked in a bank until few years ago. She suggested we meet for lunch one day and she will demonstrate the making of Khandvi. So last Thursday was convenient for both of us and we fixed a day out for ourselves.
I was amazed at the ease with which she cooked it, giving me tips along side. The best part of it was we did not have many dishes to clean up after the cooking. A bowl in which she mixed the batter, the pan in which she cooked and two plates on which she spread the cooked batter and a ladle!!! That was interesting for me.
She told me that she had learnt it from a friend, whose mother would make paper-thin layers. The lady would add lot of water and cook for long stirring constantly. The end result will be very desirable. However, her friend had told her that even with lesser water added to the batter and cooking on a low flame is good enough; not to waste time and fuel, a small compromise wouldn't matter. Yet I did not find the sheets thick, rolled well and looked appealing as delicious as they tasted.
Here is the recipe she used to make about 18 pieces. Her tips, I have added as while preparing.
Ingredients:
1/3 cup (heaped) gram flour
1/3 cup slightly sour curd (some recipes suggest more, but my friend used only equal quantity to the gram flour) (beaten)
1 cup water
Salt as per taste
1teaspoon sugar (optional)
2 teaspoons ginger - green chilli paste
1/4 teaspoon turmeric powder
1/4 teaspoon asafoetida
3 tablespoons cooking oil

For tempering and garnishing:
2 teaspoons cooking oil
1 teaspoon mustard seeds
2 teaspoons sesame seeds
2 tablespoons grated coconut
2 tablespoons chopped fresh corriander leaves


Method:
Mix the gramflour, salt, ginger-chilli paste, beaten curds and water. Obtain a smooth thin batter which is free of lumps. Add the sugar, asafoetida and turmeric powders also.
Heat oil in the pan and add the prepared batter.
Stirring continuosly, cook the batter until well cooked. The indication is that the batter will obtain a light brown tinge, glaze from the oil and will not stick to the walls of the pan.
The batter should still be in a semi liquid state, tipping more towards solid state. Over cooking it will result in a mass that will not spread.
Keep a big flat dish over-turned ready, having generously greased the surface.
Transfer the cooked batter quickly on this surface and with the ladle spread it in a thin sheet over the surface. This has to be done very fast as the batter will thicken as it cools and become difficult to spread. also you will find that it coagulates in tiny masses.
Allow this to cool just about manageably warm. Too much cooling will thicken the mass and render it become unable to roll.
Using a knife make strips of this sheet. Roll each strip into spirals. Place them in a separate dish.
If the batter has been cooked evenly and correctly, the strips will easily roll and not crack in the middle.
Put the pan on the stove and heat the oil for tempering. Add the mustard and sesame seeds. When they crackle spread them over the rolled khandvis. Garnish with a generous sprinkling of fresh, grated coconut and chopped corriander leaves.

Serve them as starters or snacks. Avoid handling them too much prior to serving. They have to be handled delicately while serving, but devouring on them is altogether a different issue!
I would love to try on my own soon. She has warned me that it is not easy tp perfect this dish within one or two trials. There is also a recipe making it in the microwave in one cookbook I have.
I shall update my trial experiment at some future date, hopefully. I am determined to try because both my husband and I liked them very much.

Monday, August 30, 2010

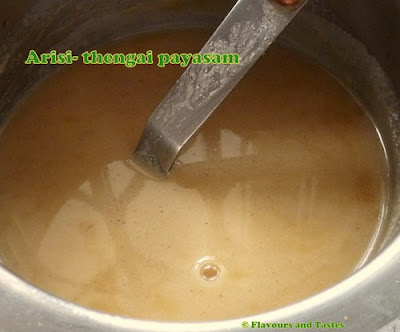
Thengai-arisi payasam - Coconut and rice porridge


The Friday succeeding the Varalakshmi pooja, we use the coconut and the rice which was used in the kalasam to prepare a sweet dish. I will not be able to use up the entire coconut in one go, unless I make coconut burfis and yet another sweet dish with the rice. This is an impossible feat, considering we are just two members in the family.
I end up cooking a small portion of both in one dish and use the rest in other dishes. This time however, I made coconut burfis and this payasam. The rest of the rice, I used up making sevai.

This payasam is quite easy and delectable. It is usually cooked to a thin and drinkable consistency. It was one of the side dishes for plain rice sevai during my childhood years.On days when my grandparents and mother restricted to themselves to eating salt-free dishes, like Kruthigai vratham or Thiruvonam they make this for a light refreshing kanji. The coconut and rice cooked with jaggery and a dash of cardamom and nutmeg added for flavour make this extremely delicious.

Ingredients: ( Serves two)
3 tablespoons freshly grated coconut
2 tablespoons raw rice
1/4 cup powdered jaggery
1 green cardamom crushed until the pods are coarsely powdered
1 pinch of nutmeg powder

This is how you make the payasam:
Soak the raw rice in some water for about half an hour. Add the coconut to the rice and grind to a very fine paste.
Take this paste in a heavy bottomed pan. Add about 300ml water to it. Cook this mixture over moderate heat stirring often to avoid lumps of cooked rice forming therein.


The rice-coconut mixture will cook and the colour will get slightly tarnished as the mixture thickens. You may add more water if required, though it will not be necessary.
Keep this on a low flame and allow to simmer.
Meanwhile, dissolve jaggery in water and strain the scum. Put the pan on the stove and bring the dissolved jaggery water to boil. Allow to boil until raw taste subsides and the jaggery syrup is slightly thick.
Transfer the jaggery syrup to the cooking coconut-rice mix. Stir and blend them completely.
Allow this to come to boil once and take off the heat.
Garnish with crushed cardamom and nutmeg powder.


Serve warm or cold, it will taste just the same...DELICIOUS!!!


Monday, August 23, 2010

My rendezvous with Aparna's Diverse Kitchen

It was such a wonderful surprise to me that Srivalli chose My Diverse Kitchen for Tried and Tasted Event, a brainchild of Zlamushka, currently taken over by Lakshmi. I have been following Aparna's space ever since I registered myself to Blogger.com, which is much before I attempted posting anything!

I cannot define the exact reason why I find her posts very attractive, it is every aspect, her introduction, the recipe and the pictures all of them put together, I must confess. Many a times I have been inspired to try my hand on baking reading these posts.

I decided I would use Srivalli's invitation to give myself a bit of indulgence this August. I tried few recipes from Aparna's kitchen...some adjusting just a bit and some following to the letter.

This post is an whole day's cooking of only dishes from her blog. I chose a weekend as it is easier to have a heavy breakfast, a lighter lunch ( I can afford to carry the stuff over, if they were excess), tea with snacks and an indulging dinner and the added advantage of having husband around to click pictures!

I spare you my drone and writing up recipes again. That is just a click away, taking you to Aparna's pages. I do this with a purpose, that I want readers of this post to enjoy her write-ups.
I am one who will not throw even the daily sheet torn off the calender without reading the contents therein. So, I can assertively state that if you want some good reading along side some good food, hop there right away.

My breakfast was Vellayaappam and mixed vegetable stew. I make my aapams regularly, this was a bit saving the soaking and grinding time. The result was aapams with truly lace-like fringe to the spongy fat porous centres.


Lunch was a Palakkad Iyer recipes. Though there isn't much of a difference from a Tambrahm menu, subtle changes to the recipe make a difference in taste.

I made vendakkai vathakkinathu, keerai mulagootal in the microwave, varatharaitcha sambhar ( she had used vendaikkai, I had to replace it with murungaikkai for obvious reasons) and tomato rasam.


The keerai mulagootal, she mentioned having pressure cooked thuvar dhal and having added to the keerai. I simply substituted thuvar dahl with masoor dhal which cooks easily in the microwave.
That was lunch friends with the usual rice and curds!


Tea time was funtime with her vanilla yo-yo biscuits. I did my tweak to the filling. I used some Tang orange juice powder to the ingredients and made orange cream! I prefer black tea and these were perfect after tea.


Dinner, my husband was looking forward to most! The house was filled with aroma of freshly baking pav. I reduced the recipe to half the ingredients she had listed. But I had to bake them in my bread tins which would hold three in a row, dividing the dough further would have given me bite-size pavs, I feared. So I got six slightly bigger pavs.


Now, they no longer qualify as laadi pav ( a friend told me that laadi pav is made sixteen numbers in all usually in the tin) but I can safely list them as pav bhaji. We could have only three pavs between the two of us and saved the rest for the next day with a different curry.
I was very thrilled to watch my husband wipe the bowl of bhaji with a last tiny piece of the pav.
I enjoyed the menu, both cooking and relishing the food thoroughly.

I have tried few more from Aparna's recipes, which will need to be featured in future posts. Await them in the next few days.

Srivalli is also currently celebrating the third anniversary of her ever popular MEC event and is calling for dishes cooked in microwave to feature in the la-carte of the Potluck party. Look out for the Keerai Mulagootal there too.
Have a good day!

Wednesday, August 18, 2010

Varalakshmi vratham - 20th August 2010


Few days ago, I had a mail through the comment thread for my Varalakshmi Vratham post of last year. The reader had wanted to know details about the arrangements for performing this vratham. I wanted to mail her, but I did not find her e-mail address there. Then it crossed my mind to make a post on the procedure which might be useful for me as well.

I kept putting this post off for long now and am sorry N, that I am giving details when the pandigai is almost upon you. However, I am sure you have read many other web pages that show up as you search and might be having a clue on 'How to proceed'. Nevertheless, one addition to that will not make a significant difference. My sincere hope is that my post does not confuse you.

The vratham is believed to have been advised by Lord Parameshwara Himself to His consort Parvathi Devi. Also that a very pious and devoted lady, Charumathi was instructed through a dream by Mahalakshmi Herself to perform this pooja. It is said that Charumathi performed the pooja and also spread the practice of the vratham to many more who have all benefited abundantly.

Usually, it is a pooja initiated to a newly wedded bride during the first year of her marriage, by her mother-in-law to carry forth the custom in the family. However, there have been women who have willingly taken up this, even if it were not customary in the family and have done that for years.

For the girls being initiated to this custom, the parents gift the important accessories such as the Kalasa Sombu ( a pot -like utensil, usually made of silver or brass/ copper which are considered best for ritualistic ceremonies) and the 'Amman mukham', again a small sculptured face of Varamahalakshmi. Otherwise they observe along with the elders.

I follow the procedure given in the Vratha pooja vidhanam book issued by Lifco book publishers. The materials that are used may vary from what I use as per tradition in a particular household.


This can be taken as a general guideline though.
The pooja is performed on the Friday prior to the fullmoon day of the Hindu calender month of Shravana, which might shift very slightly to fall in one of the two Tamil months of Aadi or Aavani.

On the Thursday, the day before the pooja, the house is cleaned and preparations are on the onset. Maakolams (or izhaikolams) with finely ground rice paste are drawn at the threshold, a convenient and auspicious corner near the entrance of the house and in the location where you
would be performing the actual pooja.
Find a few mango leaves to decorate the threshold and reserve some to decorate the kalasam.
You will need a slightly large plate to place the kalasam and a manaipalagai (a wooden plank fitted with small legs) to place the above on. The kolam has to be drawn on this plank also.


What goes into the kalasam:
One heaped cup and a quarter more of raw rice.
About a tablespoon of thuvar dhal.
Packets of turmeric and kumkum or two whole turmeric pieces and kumkum in two tiny packets.
A coin of Re.1 ( any coin)
Few raisins, dry dates, one lime fruit and betel leaves and arecanuts (these are not a must)
What goes in the large plate placed underneath the kalasam:
Same quantity of rice, dhal betel leaves, arecanuts, a tiny mirror, a comb and sets of bangles and palm leaf tied together known as picholai karivalai ( or kaadholai karugumani) available in shops selling materials for such poojas.

How to decorate the kalasam and invoke the diety:
Having taken the above mentioned stuff in the kalasam, place some sandal paste and kumkum on the body of the utensil.
Place about 5 to 7 mango leaves into the utensil. Coat a whole coconut yellow with turmeric paste.
Fit the coconut upon the mouth of the utensil between the mango leaves. Ideally place it in such a way that the mango leaves are on the hind side of the utensil.
The figurine of the 'amman mukham' is usually made in such a way to fit it over the coconut, either like a hairpin or with a ring-like hinge.
Place the mukham over the cococnut and fit it to sit over the neck part of the utensil or the coconut.
Use your resources and imagination to deck your idol with jewellery and flowers.
Place the plate on the plank.
Thus done place this whole arranged unit at the point where you have drawn the maakkolam near the entrance. Soon after setting this up, light a lamp next to the idol and offer something as neivedhyam. Some procedures suggest ven pongal, though it is flexile depending on individual liking and ability.
Take care that the kalasam sits well on the plate as you will be required to be lifting the whole with the manai and walking a small distance from near the entrance to the appointed spot.
On Friday, the Vianyaka pooja is performed requesting Him to take care of any hurdles that may come by. Then the amman is carried into the house singing hymns welcoming Her. The entire unit is then placed in the spot where the pooja has to be performed. There are specific mantras to be chanted and a procedure to be followed during the pooja. You may find them in books and cassettes available explaining them.
The neivedhyams related to this festival have been discussed in my last year's post.


I have shown my suggestions in the pictures taken over the past few years.
There have been circumstances that I have not been able to procure one or few of the essential materials, living in countries where they are unheard of. I have managed just about contiuing the procedure to the best of my ability. So, please do not be upset if you are not able to stick to the guidelines, count the blessings and conduct the pooja.
Perform the pooja with reverence and devotion. That pleases the Gods most.

Monday, August 16, 2010

Aval stuffed parathas


My sister and I were discussing food that was left over one afternoon. There were small amounts of almost everything she had cooked. And there were little of two of the thokkus she had made recently. Quickly we formulated a recipe with all of themput together to serve with the idlis that night. We decided since there is always milagai podi and some chutney to top it up, we would finish these too.
We were so engrossed that we did not realise the entire conversation was happening with her son around, until he quipped some comment! Naturally, he repeated the above word to word at that night's dinner table for the benefit of the rest of the family. But neither of them had the slightest idea that the dish was a 'make-up disguised' left-over food.
Last Sunday, I was watching Sanjeev Kapoor's Khana Khazana on Zee tv where he gave a tip about using left over pulav. My husband looked at me pointedly and commented that the earlier discussion with my sister was so loud to have reached Sanjeevji's ears!
I told him whether that was a fact or not, I have taken cue from this and I am ready to make it work during lunch that weekend. That is when Aval upma stuffed paratha came in!


There is no exact measurements to be given here. You can work any left over food to suitably be stuffed in.


Here is what I did. The upma had enough vegetables init while I cooked it. I just added some more fresh coriander leaves and pulsed it in the mixer to a rollable texture. Made small balls to be filled in the outer dough made with wheat flour, rolled out slightly thick parathas and cooked them on a hot griddle until both sides were done.
You may come up with numerous options to stuff the parathas with. Check the above picture and you will realise how I've enjoyed making them.
Serve it with any pickle and yoghurt! Sanjeev Kapoor stuffed them with left over pulav, slightly mashing the pulav:)

PJ is taking ideas to make left overs work their way back to our dinner tables. These parathas are on their way to her.

Sunday, August 15, 2010

Baris- dried lentil dumplings for the Indian Cooking challenge


Srivalli could not have chosen a more not-so-suitable month for us to attempt something that requires lot of sunshine. I was apprehensive to go ahead with the challenge of making Baris otherwise popularly known as Punjabi wadiyan, which when lightly fried and added to certain dishes just gives an extra taste to it, when the rains are upon us and the sun is playing peek-a-boo, even here in Ghana.

The recipe, How to make Bari - Dried Lentil Dumplings?
Bari or Badi or Barian
she had adapted from Mamata's kitchen called for so many ingredients I thought might not be available in Ghana. That made me check out more web pages on this recipe. The ingredients were more or less the same in all of them, that I went looking for them in the Indian grocery stores, where I did find them.
The only hope was that there will be enough sunshine for just about a day to dry the baris. Then I read yet another recipe @ Kichukhonn where the baris were oven-made!


Please spare me repeating the recipe found in the sites ( many other web sites/ blog spots have the same recipe) and take some time to visit these two sites as well as my fellow members who took the trouble of writing them for you.

I have tried to do this in my pictures, so enjoy the visual tutorial.


I have made only 1/5 th of the recipe given by Mamata. I had some sunshine for few days in a row. But the baris do not dry to what is called bone-dry within a day. Well, switch on your oven and try baking them on a low temperatue for a really long time, say about 2 hours or more on 100 Degrees Centigrade, you have them ready for use that very day.

The spices that go into the baris are sure to make them very spicy and in the recipe I found that salt was missing. I have added salt to the dough and replaced the ash gourd with bottle gourd.

I thought I shall share with you a light moment...I instructed my security guard to keep an eye on the sun-drying baris. As I was speaking quite fast, he mistook that if the birds came to peck on them, he should allow them to have it:) He was confused why I came out every now and then, each time to shoo the bird away.

You might find some recipe posts that might be using baris to 'lift' taste to use the term Srivalli has given, coming up in this site in the near future.

They were some what similar to the kuzhambu karuvadam found in Tambrahm homes, that find their way into some kootus and vendhya kuzhambus, to 'lift' the quantity and quality.
These are easy enough to make and can be stored for a long time.

Thursday, August 12, 2010

Jam Sandwich biscuits


The cover page of the book I have, sports a tea spread featuring these biscuits. Just as in all cookbooks the presentation would lead you to the page looking for the recipe. For the simple reason they are catagorised under rolled and cut cookies, I have been looking at the picture and shutting the book with a sigh. I think that rolling and cutting is a daunting task. The other reason was that the list of ingredients includes one small egg white. Until I read many blogs giving substitutes for eggs, I have not read the recipe past the ingredients list.

With the newly found knowledge of egg substitutes my interest in this recipe was rekindled. And Lo!!! the egg white is only for brushing the top of the cookies! now HOWZZAT, for such ignorance? I own this book for over 10 years now :(

Anyway, finally I read the recipe, then again for a confirmation and again with the zeal of trying it out. Now you see that I have successfully tried them out.
The recipe has been adapted from, of course, my only baking guide, Cookies Galore by Betty Saw. I halved the ingredients, and went one step further to bake a few minutes again after sandwiching the jam.
The hurdle was that my cookie cutter was not of desired size, I tried with lot many stuff I could think of, which did not work. So no floral pattern. I have skipped the egg wash which would otherwise add a shine to the top.
The day I baked they were soft, to the point that I thought they would break and the jam was oozing. But they were deliciously right by the next day and the jam was as chewy as in the jim jam biscuits we buy in India. However, I would like to reduce the butter and try with a better quality custard powder next time.

To quote Betty Saw,
"these are so buttery and deliciously short, that you will wonder why you ever bought them. They taste wonderful even without jam"
Unquote.

The recipe:
Rolled and cut cookies/ 45 minutes preparation time/ 15 minutes baking time.
Makes 34

Ingredients:
240 grams self raising flour
2 teaspoons baking powder
120 grams custard powder
250 grams butter at room temperature
180 grams icing sugar
2 teaspoons vanilla essence
Ready to use jam, any flavour

Method:
Line the baking trays with non-stick baking paper.
Sift together the flour, baking powder and custard powder.
Using an electric mixer, cream together the sugar, vanilla essence and the butter at medium speed until light and fluffy.
Stir the sifted dry ingredients and beat on lowest speed until they are blended well.
Roll out the dough between two plastic sheets to 0.75 cm thickness.
Chill this rolled out dough for 30 minutes.
Pre heat the oven to 175 Degrees Centigrade/ 345 Degrees Farenheit.
Using a 2" floral cookie cutter, cut out shapes of the dough. From one half of the shaped discs scoop out the centre making a hallow there. Place on prepared trays.
Bake for 15 minutes until golden brown.
Remove and cool on wire racks.
Place a small ball of jam over the whole cookie and cover with the ones with the hallowed centres.
Cool and store them in cookie jars.

The recipe as given in the book stops with this step.
I put the sandwiched cookies on the tray and baked them for a further 7 minutes at 170 degrees Centigrade.


Serve these very delicious biscuits with tea. The scooped out centres could be rolled out into cookies as well. I simply made some floral cookies with those tiny scoops of dough.

These are off to Ruchika cooks who is hosting the current session of Baking from a book.

Wednesday, August 11, 2010

Idiyaappam - Very Tamil String Hoppers


I first came across the name string hoppers in the manual that came along with my very first Sumeet mixer-grinder. Read the recipe and wondered how different that was from the sevai/shavige we usually make. Then I realised that was just the idiyaappam we relish outside home, in restaurants.

I make sevai very often as my husband loves it, having been a regular breakfast on Sunday mornings at his parents home. My sister was the one who pointed out that idiyaappam will be a quickie compared to the usual sevai, if you keep the flour readymade. The flour can be made in big quantity and stored for quite a while. Then the task is a breeze and you can have it with your favourite side dish. I keep the powder in stock in my pantry.

Given a choice, I will incline to sevai as they are softer. But if I am looking for a quick yet filling dish, I would go with idiyaappam.

To prepare the rice flour:
Wash and soak raw rice for an hour.
Drain and spread on a clean cloth for a few minutes.
Pound to a very fine powder in the mixie. If you have the facility of a commercial mill, you may get the grinding done there in larger quantities. You may do the pounding in small batches until all the soaked rice has been powdered.


Heat a heavy, rounded bottom pan. Roast the rice powder on a medium flame constantly tossing around until you are able to draw a line dropping the powder through your fingers.
Seive for lumps and these lumps can be powdered again.
Allow the roasted powder to cool before storing in clean air tight containers.
This can be stored at room temperature for a couple of months.

Idiyaappam Ingredients:
Powedered and roasted rice flour 1 cup
Water 1 and 1/3 cups (sometimes a little more depending on the age of the rice) (usually 1 cup is the measurement given in many books, but I have found that the dough dries up quickly, hence add more water.)
Gingley oil or any cooking oil 2 teaspoons
Salt to taste.

How to proceed:
Take the measured water, salt and oil in a pan and bring the water to boil.
Remove from the fire.
Insert a long handled ladle in the water and drop the rice flour in. Give one brisk stir and cover the pan tight.
Leave for about 20 minutes allowing the dough to cool.
Open and using cool water/little amount of oil for your palms, mix the dough kneading it applying some pressure. Knead to a smooth lump free dough. If necessary increase the oil by another teaspoon.
Prepare two or three flat plates that may fit in the steamer with ease. Fit the murukku press with the disc that has fine pores.
Pour some water in the steamer and heat it.
Make fist size balls of the dough, put a ball in the cylinder of the press.
Pipe out the dough on one of the plates in an evenly distributed circle.
Place the plate inside the steamer and allow two minutes of steaming.
Open the lid and remove this plate. Meanwhile, press the next and steam. Repeat the above steaming process.
While the second is being steamed, allow the first idiyaappam to cool just a bit and remove from the plate. This plate is now ready for the next ball of dough to be pressed on.
Place the steamed idiyaappams on a wide plate, slightly apart until ready to serve.
Idiyaappams can be served either hot or just about warm with hot kurma, sweetened coconut milk or stew. I make the ceylon kootu to go with idiyaappams.


Tuesday, August 10, 2010

Ceylon Kootu for idiyaappam


I wonder why we call this ceylon kootu while it is almost the same as stew my friend prepares. This name is listed in S.Meenakshi Ammal book and interestingly one similar recipe is found in one of the Tarla Dalal cook books as well listed as Ceylonese curry.
The curry is simple and easy to prepare and goes very well with plain sevai/ shavige, idiyaappam and sometimes with steamed rice also. However, I prepare this mostly for aapam, idiyaappam or with sevai as my husband prefers plain sevai served with coconut chutney or the stew.
Ingredients:
1 cup mixed vegetables, cubed, cut or diced accordingly.
1/3 cup green peas, frozen/ fresh or dry - soaked and cooked
2 tomatoes cut in 8s (optional)
1 big red onion
2 cloves garlic (optional)
coconut milk extracted from 1 large coconut, in three consistencies, thick, medium and rare
salt to taste
2 teaspoons garam masala powder

Tempering:
2 teaspoons ghee/ cooking oil
1 bay leaf
1" cinnamon
2 pods green cardamom whole
5 cloves
3 green chillies slit

Method:
Wash the vegetables and cook in the thin coconut milk until vegetables are tender.
Slice onion and chop garlic.
In a pan, heat the ghee/ oil. Add the ingredients listed under tempering and saute for a 2 minutes. Add the slit chillis and sliced onions. Allow the onion slices to cook until lightly brown. Add the garlic and saute further.
Drop the cooked vegetables in with the salt and add the medium coconut milk.
On a low flame allow the coconut milk to simmer. Add the garam masala and tomatoes. Cook until the tomatoes are done.
Finally add the thick coconut milk and keep on low heat for about 5 minutes until the raw taste subsides. Do not over boil the coconut milk allowing it to curdle.
Remove from stove and serve warm with idiyaappam.


Sunday, August 8, 2010

Nei Payasam and Rawa Vadai for Aadi Velli


This Friday, being the third to occur in the Tamil calender month of Aadi, I wanted to make something that I have not tried cooking until now. I had tasted Jayasree's nei payasam while we visited her and had simply loved it. So I decided on that and kept flicking pages of S.Meenakshi Ammal volumes for the savoury idea. My eyes opened wide with the recipe for rawa vadai which she had posted three variations. Then and there, I wanted to try the same.

Please stop by Jayasree's Kailas Kitchen to read her Kerala special nei payasam. I refrain from repeating the write up. I have reduced the quantity of jaggery as the one I store is very sweet. I was apprehensive that the cooking of the payasam would take a long time and I might have to postpone a few chores. No, it was done in a reasonable time frame, giving me lot of time to experiment the next recipe.


The next was the rawa vadai, which, if you had time to hang curds to drain the water off, will be done in a jiffy. The other two methods involve cooking of the rawa and then deep frying, which may result in more oil consumption. So I chose this recipe. I passed the curd on a thick cloth and pressed it through the strainer prior to hanging it. This helped quicken the process of obtaining hung curd.

The following is for forty numbers thin and crisp rawa vadais that are delight to munch on lazy weekends.


300 grams semolina
500 ml slightly sour curds
Salt to taste
1'' piece ginger finely chopped
10 fresh green chillis chopped
1 small pinch of asafoetida powder
Few curry leaves chopped
Few coriander leaves chopped
2 teaspoons ghee
Oil for deep frying

If you desire to make the vadais by evening around tea time,place the curds in a thick cloth and tie it up, allowing the water to drain in a utensil placed underneath.
Let it hang so until mid afternoon.
Once drained well, remove from the cloth and transfer on to a mixing bowl.
Add salt, asafoetida powder, ginger, curry leaves, coriander leaves and semolina to the curd. Mix well to blend.
Finally add the two teaspoons of ghee and mix them thoruoghly.
Keep covered for a few minutes.
Pour oil in a heavy pan and keep it on fire.
Meanwhile, pinch out small lime size balls of the dough.
Slightly spread some oil on a thick plastic sheet or banana leaf. Flatten out the pinched balls on the sheet as thin as possible.


Once a batch of four to six have been flattened to discs, drop them in hot oil.
Keep the rest covered with a damp cloth.
While frying toss some of the hot oil on the top side of the vadais, turn them over when one side is done and fry until the other side is well done.
Remove from the oil and drain on absorbent tissues.
These vadais will be crisp and will stay so for two to three days. They will not absorb much oil also.
Having made the two recipes and performed the neivedhyam, I waited impatiently for my husband to get home and give his verdict, which eventually turned out to be one that brought the widest smile on my face:)


Saturday, August 7, 2010

Nei- Homemade Ghee


When we grew up, we were very used to watching our elders churning butter out of home set curds and making ghee with that. Having a meal without ghee to enhance the taste, was rare. If at some given time the ghee on hand would not suffice, the Moarkari - the curd vendor would drop by and sell ghee.
During our summer holidays, when we visited our grand parents in Gobichettipalayam, it was assigned to any two of the young boys and girls to walk to the vegetable market with an adult, mostly an uncle, to assist him carry back the day's purchases. Many a times I would carry an aliminuim thooku (container fitted with a lid and a long handle that enabled it to be lifted and carried along) to buy nei, which is Tamil for ghee/ clarified butter.
Being part of Kongu nadu cuisine, that had a unique taste enhanced by the addition of drum stick leaves while boiling the butter down to ghee. The vendor would dip her finger into her container and bring out a drop of her produce to rub in on the back of your palm. You are encouraged to smell the flavour to decide the taste. The flavour will linger on your palm for long.

Nowadays, as we have all shifted to low fat or skimmed milk for our daily intake, the churning does not yield butter. Even in India, my mother purchases butter from Aavin and melts it down to ghee.
I make ghee at home too. It is one of the basic recipes and I share with you here. I borrow some drumstick leaves from my Ghanaian neighbour to drop them in. Interestingly, in a particular dialect of the Ga language drumstick is referred to as morangai, similar to many South Indian languages.
A good brand of unsalted butter weighing 200 grams will yield 175 grams ghee.


200 grams butter.
A small sprig of drumstick leaves.

Keep butter in room tempearture prior to making ghee.
Take the butter in a heavy bottomed pan. Switch the heat on and as soon as the butter starts melting, bring the heat down to medium.
Use a spatula and stir once in a while.
The butter will melt and start to boil foaming initially.
The foam reduces to bubbles and finally the bubbles gradually start dying out. Drop the leaves in.
This process will take just 6 to 7 minutes.
At this point, if you sprinkle a few drops of water in the boiling liquid it will sizzle.
Allow just about another minute and switch the fire off.
Let the pan sit on the warm stove for some more time.
The clear liquid will surface on top and some residue of the burnt milk solids will precipitate to the bottom of the pan.
Store in clean containers. Ensure that spoons that are inserted every time, are dry and clean.
The ghee will be very flavoursome and when it cools down the texture will be like sand grains.
This basic ghee can be used in cooking most dishes or added to hot steamed rice with some kuzhambu or rasam and eaten. You may use ghee to temper some foods, roast garnishes and so on.

Friday, August 6, 2010

Eggless Ginger biscuits


Last week, I tried this recipe, adapted from a book Celebrity Chefs' Cookbooks: Betty Saw, Cookies Galore.

I am very fond of the McVities Ginger nuts, a biscuit pack that I am likely to grab often. The love for the biscuits is so, that while in Egypt, I used to stop at the Shell pumping station's Select outlet in Cairo, just to pick them up. They were not available in the super markets in Port Said.

The book had a very workable recipe..but to my dismay, I can not just walk in to a store and pick most of the ingredients required. However, I wandered through the many sites and found
a way to make home made golden syrup and bought some interesting ginger jam which substitued preserved stem ginger ( preserved stem ginger can be made at home also) and I used freshly grated ginger too.
The resultant cookies were not really cookies but slightly thinner ginger biscuits which were a perfect match in texture and taste to my favourite McVities.
Now I have some more golden syrup left over from making 1/4th of the above recipe and would try the cookies again.

I give below the ingredients for the recipe the by Betty Saw for those who want to try the original. My substitutes are in brackets next to them. The method is similar to that given in her book, but the few alterations that arise with substitution of few ingredients.
Ingredients:
Shaped and hand moulded cookies/ Makes 62
Preparation time: 30 minutes/ Baking 15-20 minutes
400 grams/14 1/4 ounces/2&2/3 cups Self raising flour
1 1/2 teaspoon Baking powder
1/2 teaspoon Bicarbonate of soda
1 teaspoon Ground Ginger ( I grated 2" piece of fresh ginger)
50 grams /1 3/4 ounces Preserved Stem Ginger chopped finely (I used 3 table spoons ready to use ginger jam)
250 grams/9 ounces/1 cup soft margarine ( I mixed 100grams vegetable shotening to 150 grams margarine)
2 tablespoons Golden syrup
175 grams/6 1/4 ounces/3/4 cups Castor sugar


Method:
Line baking trays with non-stick baking sheet.
Sift together the flour, baking powder and the soda-bi-carbonate.
Mellt the margarine-shortening mix and the golden syrup. Remove from heat and stir in the stem ginger (ginger jam in this case along with the fresh ginger) and sugar.
Stir in the sifted dry ingredients to form a soft dough.
Roll this dough into walnut sized balls and place them on the prepared trays. ( I rolled them and pressed them down a bit, made a design with the back of a fork)
Pre heat the oven to 165 degrees C/330 degrees F ( My oven settings had only 10 degrees C increments, hence I set it to 170 degrees C)
Bake cookies for a good 18 minutes until golden brown.
Leave on the trays for a few minutes and cool them on wired racks.
They may feel soft while warm. On cooling they acquire a crunch and a harder texture.
The ginger jam had some small pieces of ginger in it and as with the bite, the feel of these pieces tasted purely delicious, that made me wonder how much preserved stem ginger would enhance the taste.
I took it for my friend's son who could not stop picking another even before he would finish one.
I am happy to have baked these even though they did not look anywhere comparable to the professionally baked picture that the book featured.

Find these Ginger nuts included in this month's edition of Baking from a book happening @ Ruchika cooks!


Wednesday, August 4, 2010

Aval Kesari in microwave


As far as I can remember, my parents have never failed to celebrate our birthdays. Having an oil bath, wearing a new dress and visiting the temple was the routine. Celebrations were most certainly in line with the Hindu calender, the day during the month of your birth conjuncts with the star that you were born in. We had the English calender birthdays celebrated too.

On the star birthday, there would be extras on the menu like a payasam or some sweet. When we were young, we did not care to think that our parents might have birthdays too. As we grew up we made an effort to remember to wish them, though we do not celebrate in a big way.

Today happens to be my mother's star birthday. I just felt that I shall post a very simple, quick and easy sweet and dedicate the same to her.
This, I made, last Friday for the Aadi velli (Friday of the Tamil month of Aadi) as neivedhyam alongwith urad dhal vadais for reading of the Lalitha sahasranama stotram.


I have made use of thick aval/beaten rice which will give a nice texture to the dish. I have not tried with the thinner variety yet. But if someone decides that might work, I would love to know.

Earlier, I tried the same with red poha and sugar alternative, but on stove top, hoping that would be a low calorie variation. That turned out perfect too. I shall post that soon. For today, I give this recipe in dedication to my mother and would love to send it to Srivalli, celebrating the third anniversary of the MEC Event with a Potluck Party.

1 & 1/3 cups thick variety aval/ poha/ beaten rice
1& 1/2 cups granulated sugar
1/2 cup water for soaking the aval
1/3 cup of water for the sugar to make syrup
4 teaspoons ghee
1/4 teaspoon cardamom powder
4 cashews broked in bits
few strands of saffron or a pinch of food colour


Pulse the aval in a coffee grinder to semolina consisitency.
In a microwave safe cup heat 1/2 cup of water on 100% power for 1 minute. Insert a wooden spoon in the cup. This helps to prevent water from super heating and the hazards that ensue.
Put the aval in a microwave proof/ safe bowl. Add this water and stir to mix evenly. Leave aside for about 5 minutes for the aval to absorb the water.
In another microwave proof bowl, add sugar to 1/3 cup of water. Set the microwave on 100% power for 2 minutes initially. The sugar will dissolve and will start to boil. Open and mix once.
Restart the microwave to the highest power and allow the sugar syrup to boil down to a one string consisitency. This may take a further 2 minutes. Open and check the syrup consistency.
It is alright even if a thread cannot form, but the sugar should have boiled down to a sticking consistency. The process is done without any lid on.
Add the aval, cardamom powder and saffron to this along with 2 teaspoons ghee. Cook this mix on 80% power without lid on for 4 minutes.
Allow a standing time of 1 minute. Take out and mix the rest of the ghee, reserving a few drops to roll the cashews in.
Use a flat microwave proof dish to roast cashews that have been mixed with a very small quantity of ghee. Roast this on 100% power for nearly 3 minutes or a bit further until the cashews are done.
Garnish the kesari with these roasted cashews and serve.


Tuesday, August 3, 2010

Pagakkai pithla kuzhambhu from Usha's Veg Inspirations


Tried and Tasted, a brainchild of Zlamushka invites us to try out recipes that have been featured in one of the blog-friends' space. This month the event is hosted at The taste space -steam, bake, boil, shake. They have chosen to feature Usha's Veg Inspirations.
I have been following Usha's space even before I started actively blogging food. I am always at awe by the fact that she tries her recipes with Health as the prime factor. Many a times I have grabbed a recipe from her site and have had to adjust, not to my taste but sadly to the availability of the ingredients.
However, most of her vegetable dishes did not command a compromise. So, I choose such dishes and enjoy.
The day she posted this recipe for the pagakkai pithla kuzhambu, I was asking my sister to mail me the recipe she uses. As I was chatting online, I found this post pop up on my reader.I abandoned the chat and scribbled down the recipe on the airline itinerary I found next to my desk.
With this recipe on hand that morning's vegetable dish decided, I set out my regular morning chores.
I did get my sister's recipe and have tried that too, which might appear on another random day.
But today, it is Usha's dish which you might find listed under
Bittergourd in lentil gravy curry with Peanuts (Pahakai Pitla Kozhambu with Kadalai)


in her blog.
I need not elaborate on how much I loved it, because I recommend you to try it out for yourselves. I am sure you will enjoy this dish.