Saturday, October 31, 2009

Deepavali with Gulab Jamuns


Deepavali around,Srivalli intended that the members of the Indian Cooking Challenge try making gulab jamuns the traditional way. A sweet indulgence indeed befitting the season. Three choice recipes were found from other blogsites to try whichever suited you. To me, all three were enticing. But with deepavali and loads other 'must try this season/ must make every deepavali' on my list, I gave two of them a try and both were just as excellent, can't choose between the two.
I have tried this recipe from Alka of Sindhi rasoi, making the mawa at home, as posted earlier.
The next was from The Yum Blog where Lakshmi had posted her paati's Gulab(less) jamuns.
Both yielded 25 - 30 jamuns depending on the size of the balls I shaped.
They were PURE DIVINELY INDULGENCE!!!! I'm trying new adjectives to add to the already existing, delicious, yummy, succulent and more!


I have followed the recipes and their tips below just as in their posts...no side-tracking, none of my, otherwise altering recipes, style, but for frying the jamuns in ghee, as I was not happy to make sweets with the oil I buy here. You may find the making of khova in my earlier post.
Gulab Jamuns from THE YUM blog
Makes: around 25 jamuns


Ingredients:
Khova – 11/2 cups/ 1 recipe
Maida – 1 cup
Sugar – 3 cups (if you want excess syrup i.e floating jamuns increase by a cup)
Water – 1 cup (increase if you’re increasing sugar)
Cooking Soda – 3 pinches
Cardamom – 4 pods
Saffron leaves – a few
Oil – 1 cup (for deep frying)
Method:
1. Combine sugar and water in a flat bottomed broad pan and simmer on a low heat until sugar dissolves. Add cardamom powder and saffron leaves and remove from fire.
2. Knead khova, maida and soda and quickly shape into balls.
3. Heat oil on a medium flame. Fry the jamuns till golden brown over a low to medium flame, keeping oil temperature uniform. Oil should not smoke.
4. Drain the jamuns and soak in the warm sugar syrup.Serve the jamuns after half an hour.
Tips:
You will achieve correct consistency for jamun syrup when 3 cups of sugar dissolves 1 cup water over low heat.Only when the syrup is ready, mix the jamun dough. Since the dough has soda, if its kept aside the jamuns will disperse while frying and will not hold well.
Right temperature of oil of utmost importance to get soft jamuns.
Never refrigerate jamuns. Jamuns when refrigerated will shrink and become hard.
Jamuns will stay fresh for 4 days when stored in air tight containers.
If you like you can add two drops of rose essence to the syrup to make it Gulab jamun

GULAB JAMUN from ALKA of SINDHI RASOI
The recipe is divided in two parts, one is making the Jamuns and frying them.
The other is making sugar syrup.


For sugar syrup:
Ingredients:
Sugar - 500 gms (This can be reduced as per taste)
Water - 1 & 1/2 cup (bit more or less)
Cardamom - 2-3
One spoon of milk (optional)
Few threads of saffron (optional)
2-3 drops of rosewater (optional but highly recommended)
Method:
Mix about 500 gms of white sugar in one and half cup water and keep it for boiling.
Add a spoonful of milk to remove the impurities (impurities if any, will form a scum on surface)Add 2-3 green cardamoms also in syrup for strong flavor, and a tad of saffron strings (optional).
Boil until you get just a tad sticky syrup.
Gulab Jamun syrup is not very dense nor too dilute as in Rasgulla.
Strain the syrup, add rosewater when syrup is slightly cooled.
Always remember two things while using rose water, do not add it while syrup is bubbling hot or on fire, and be particular about the quantity mentioned in every recipe, since even few drops of excess rosewater could lend a bitter taste to the final product.
For Gulab Jamun:
Ingredients:
Unsweetened Maawa* - 250 gms (Boiling 6 cups/1&1/2 litres of milk and reducing it will yield 250grams of Maawa)
All purpose flour - 1 & 1/2 - 2 tsp
Cornflour - 1 tsp
Green cardamom - 1-2 crushed
Oil for shallow frying
* (khoya-the condensed milk thickened till it turns into moist dough, preferably made from cow’s milk, also known as Hariyali mawa)
Method:
Mix all the ingredients in a wide mixing bowl until soft textured dough is obtained (keep mixing until it is really soft)
Make very small sized balls (bit larger than pebbles) as they swell up after frying and soaking in syrup.
Make sure that the surface of dough balls is really smooth without any cracks.
In case the cracks refuse to go away, slightly wet your palms with water and roll the flour till absolutely smooth.
Now take little oil for frying in preferably flat bottomed pan, and heat the oil.
But gulab jamuns are to be fried on LOW FLAME or else the surface will be browned while the core will remain uncooked.
Some prefer to place an unsalted pistachio in the center of every gulab jamun while making balls, that way the core of gulab jamun is not left uncooked.
Fry one or 2 gulab jamuns at a time and always remember to STIR THE OIL with slotted spoon AND NOT TO TOUCH GULABJAMUNS, which means keep swirling the oil without tossing or turning gulab jamun.
Fry till light brown in colour, remove on tissue paper and repeat the procedure with rest of dough.
Now soak these in COOL syrup for few hours.
They will surely swell up.
These can be stored in the same syrup till consumed.
If there are cracks in the balls before frying it will burst open while frying, in that case adding a bit of cornflour will surely help.
You can enjoy it hot or cold ,either way it is delicious.
Now that you have two recipes, I am sure you will enjoy making gulab jamuns from scratch at home.
I am told that when my husband was a kid, every deepavali my mother-in-law used to make gulab jamuns using store bought khova. She does not any longer owing to poor health. My husband was never tired of reminiscing this whenever I made gulab jamuns with GITS/MTR or whichever ready mix. I have a good workable recipe which my mother used. But was always putting it off for another time. Now that the challenge was posted and having given the recipes a try, with much success to point out, I am sure to try again and satisfy his cravings for his mom's cooking!

Friday, October 30, 2009

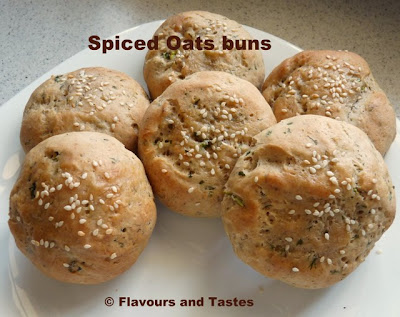
Spicy oat buns


During my pregnancy, I had terrible nausea right from forty odd days through my term. I would throw up every morsel of food and between my mother and her maid, they would clean up and feed me again only to repeat all over. On some odd occasions when I would retain food in my system it would be the kara bun bought from some bakery in Namakkal. The bun used to be spiced with pieces of chili and curry leaves in it. The size of an Indian pav bread, one bun was all I would eat. If I craved any food, I think the fear of throwing up had curbed it.
Many years later when I started baking bread at home, I've tried recipes for dinner rolls and buns from various recipe sources to capture the essence of the buns that sustained me through my pregnancy. There was one Russian potato bread which nearly matched the kara bun which I have not made in a long while.
This Monday morning, after a very lazy weekend, I wanted to try putting my own ingredients to bake my favourite kara bun. Inspired by Usha's oats pav, and Priya's Oatmeal banana bread, I powdered the quick cooking oats to combine with a fair quantity of whole wheat flour and a lesser quantity of all purpose flour.
The bun felt light when I removed from the baking tray. I had them with capsicum macroni soup and the meal was filling.
Ingredients: (for just six buns)
(the cup measure given is 175 ml -the stainless steel coffee tumbler found in south Indian homes)
1 cup powdered quick cooking oats
1 cup all purpose flour
1 cup whole wheat flour roasted slightly in a teaspoon of ghee
1 &1/2 teaspoon dry active yeast
2 green chilies
1 teaspoon salt
1 teaspoon sugar
2 tablespoons warm milk to raise the yeast or water
A fist full of chopped fresh coriander leaves
2 teaspoons sesame seeds
2 tablespoons cooking oil for the dough
1 tablespoon oil to grease the utensil
Warm water to knead a smooth dough


Method:
Add the sugar to the yeast in a bowl and the slightly warm milk. Cover and allow the yeast to grow.
Sift together the flours and salt. Do not discard the husk, add it back to the flour mix.
Rub in the oil and once the yeast has developed, incorporate it to the flour mix. Knead to a soft dough adding sufficient warm water. Knead well for about 15 minutes.
Grease a big utensil and place the dough in it allowing room for it to double. Cover the utensil.
I usually place the utensil in a plastic bag and tie the mouth and lift it upwards.
In about 2 hours the dough would have almost doubled.
Remove it from the utensil. Add to this the chopped chillies and coriander leaves.
Flour a board or your kitchen counter top and punch the dough down. Continue firmly punching for another 10 minutes.
Cover again and keep for another 20 minutes.
Remove and make six balls out of this. Place on a slightly greased baking tray well apart from each other.Sprinkle sesame seeds on top of each bun.
Pre-heat the oven to 200 degrees Centigrade.
The balls would have again developed on the tray. Place the tray in the oven and bake for 17 minutes. Take off the oven and cool on wired racks.
Serve with any soup or can be had just like that for a mid morning snack or tea time snack.
You may bake them without the spices and pack your kids' school snack boxes.
I would like to send these buns to EC's Light meal event


and to
Sharmi's CFK happening this month @Sireesha's KidzDelight with CFK Wheat


Saunfwale Aloo Baingan


This recipe is from Tarla Dalal's Swadisht Subzian cookbook. Sometime in 2005, I was so bored that internet was my only source of recreation in Port Said, Egypt apart from watching the convoy crossing the Suez canal from my balcony every morning and evening. My husband worked 12 hour shifts then and with having to cross the Suez on two ferries, he was away almost 15 hours.
I was hooked on to the internet and most of the music websites and cookery websites were in my favourites. I made a membership for Tarla Dalal.com then. I received two wonderful books free with the membership. This particular book deals with cuisines from most parts of India. She has a small note to each recipe which tempts you to try them.
I had first cooked this vegetable side dish following the book. Then I switched to the microwave cooking when I was sure that works well. So I am today posting the microwave version of a very delectable dish that goes well with rotis, dhal chawal and phulkas.
Ingredients:
1 cup potatoes peeled and cut in thick slices
1 cup brinjals cut in thick rounded slices
1/2 cup onions sliced thickly
2 teaspoons ginger-garlic paste/ alternatively grate both ginger and garlic
Salt to taste
1/2 teaspoon chili powder
1/4 teaspoon turmeric powder
For tempering:
1 tablespoon oil
1/2 teaspoon cumin seeds
For garnish:
1 teaspoon fresh coriander leaves chopped finely
For the touch of North Indian flavour:
1 tablespoon whole coriander seeds
1 tablespoon fennel seeds


Method:
Keep both the cut slices of vegetables separately in bowls of cold water until use.
In a flat micro proof dish, take the fennel seeds and microwave on high for 1 minute.
Similarly microwave the coriander seeds on high for 2 minutes and on medium for a further 30 seconds.
Cool both and powder them.
Heat cooking oil in a microwave bowl for 30 seconds on high. Add the cumin seeds and again allow it to crackle on high micropower for 1 minute.
To this add the ginger garlic paste or the grated ginger and garlic, turmeric powder and chili powder. Add the sliced onions, mixing well in the oil. Return to microwave cooking, uncovered on high power for 4 minutes allowing the onions to brown.
Once done, drain the potaoes and add them to the above. Sprinkle 1 tablespoon water. Cover and cook on high micropower for 4 minutes. Allow a standing time of further 4 minutes.
Take the bowl out and add drained brinjal. Return to microwave. Cook covered for 3 minutes.
Open and add the salt and the roasted powder. Give a toss to mix them. Put back in the microwave on medium power, cook without lid for 3 minutes.
You may increase the time if the brinjals are not tender. But do take care not to turn them too soft.
Remove and garnish with coriander leaves. A very flavoursome side dish is ready to be served hot.

This dish is being sent to Srivalli's MEC Event happening this month @ Suma's Veggie Platter with Fresh Produce
and to
Sunita's Think spice being hosted by Priya with Coriander seeds.


Thursday, October 29, 2009

Parsi fare - Khara papeta and Rotli


My first posting was at Coimbatore; initially I stayed in the YWCA and later moved with a Parsi family who were accomodating working girls. Their bungalow house had many outhouses which were rented out to us. By the time I took rooms with them, Mrs.B had passed away. So only uncle B and his younger son were at home.
There was a family who cooked for them and food for the rest of us were cooked somewhere else and brought to the house. Later, Uncle B's daughter, HD came down from Bombay with her children as her husband went to work in the Gulf. She was a very efficient cook and trained the maids to do loads of Parsi cooking.
Though we were their wards, they never treated us such, on many occasions we were treated with goodies cooked in their kitchens. I have watched HD cook, instruct and train the maids. She used to roll out these very soft rotlis. She would make not just about a dozen, but sometimes thirty or more, with as much ease. When I married she gave me one notebook with many recipes reorded by her own hand. I know not what happened to it today, twenty odd years on.

However, when Lakshmi's RCI this October edition was announced to be hosted by Meera @ Enjoy Indian Food, celebrating Parsi Cuisine, I decided to send a few in, but only managed these today and if time permits, the nankhathais that I baked.
The two recipes have been adapted from two sources upon searching the internet and a recall memory of Huti's recipes. Hope you enjoy them as much as I do.
Khara Papeta:

This is a very popular potato dish made in every Parsi home.
Ingredients:
250 grams potatoes peeled and cubed
1 medium onion chopped
1 tomato chopped
1'' piece ginger
2 green chilis
1 garlic pod (optional)
Salt to taste
2 tablespoons cooking oil
1 teaspoon cumin seeds for tempering
2 teaspoons finely chopped fresh coriander leaves for garnish.
Method:
Grind ginger, garlic and chilis to a paste adding as little water as possible.
Heat oil in anon-stick sauce pan. Temper the cumin seeds.
Add the chopped onions and saute until they are very translucent. Add tomatoes and salt.
Then add the ginger-chili- garlic paste and saute to remove raw flavours.
Add cubed potatoes and 1/2 cup of water. Cover and cook until potatoes are soft and all water evaporates. The spices would have been well absorbed by the potatoes in the process.
Spicy Khara papeta is ready to serve after a garnish with fresh coriander leaves.

Rotlis:
Ghau ni rotli is whole wheat flour rotis that are soft and will remain soft for hours. High in fibre, they can be had with any side dish. You can make them ahead and store in airtight containers. Remove from the containers while ready to serve, wrap them in thick kitchen towels and microwave on high for few seconds and serve the soft rotlis hot.

Ingredients:(makes 8 rotlis)
1 cup whole wheat flour
2 teaspoons oil for the dough and few drops to spread while rolling
Salt to taste

Warm water to mix a pliable dough.
Method:
Mix the oil and salt to the wheat flour. Incorporate them thoroughly by rubiing them in with your fingers.
Gradually add very warm water and knead to a pliable dough. Beat the dough repeatedly on a flat surface, punching and kneading to get a very soft texture.

Keep in a utensil, covered with a damp muslin cloth and a lid. Keep aside for about an hour.
Roll the entire dough on a board like a cylinder and cut out 8 portions.
Roll one portion initially in a small disc. sprinkle oil over top side, fold the circular disc twice in the middle to get a triangular shape.
Repeat with the eight portions. Keep covered until you finish this process.
Take the first and using flour sparingly roll them in chapattis, working from the edges, pressing lightly.
Heat a tawa and cook the prepared rotlis. They may puff up while cooking. Allow to cook well but not very brown and burnt.
Cook all the rotlis and place them wrapped in a kitchen towel and store in airtight containers.
These would have developped layers within. You may tear them and stuff your side dish of relish. I've seen people open them like envelopes and even pouring some honey in and having them.
They can be enjoyed with any side dish.

Naan - Tried and Tasted from Wandering Chopsticks


Trupti's food corner is hosting this month's edition of Zlamushka's Tried and Tasted event featuring Wandering Chopsticks.


Trupti says that the author of the blog is mysterious, she does not want to reveal her identity. She is from Southern California. She loves to cook and try many cuisines.
I chose her naan just because I was sure that it will be well received at home. I made the naan following her recipe. Read it here. I had served them with channa masala and aloo mutter masala, which I shall post later.


Now, for today, just enjoy naan from Wandering Chopsticks.


Wednesday, October 28, 2009

Rajma and greens pulav


Until few years into my marriage, I was not venturing to try my cooking skills beyond a certain periphery. My husband used to be very " pick and choose" with his vegetables. Most often the menu will be potatoes, okras, carrots and the likes with regular sambhar or rasam. There was a time when one elderly relative thought that I was lazy to venture in the kitchen! Cooking spinach and greens was once in a blue moon. When and how he started eating every dish without protest, I have no clue. But I am glad that he eats most of them cooked in many varieties now.
I incorporate greens and leafy vegetables in my cooking as often as possible now. I had tried the Saagwala rajma from Tarla Dalal and quite liked it. On a weekend when my husband worked at office and I was busy with preparations for deepavali, I tried the rajma rice with the greens I had. Made it with a bit of my own masala and cooked a pulav. The taste was great and the rice was colourful too. Both of us enjoyed the one dish meal with a raita.


Ingredients:
1 cup uncooked basmati rice
1/2 cup kidney beans
1/2 cup chopped greens (I used Amaranth leaves)
2 medium onions sliced finely
Salt to taste.
Roast dry in a pan and powder finely:
2 table spoons coriander seeds
1'' stick cinnamom
4 cloves
4 medium spice variety red chili
Other ingredients:
1 medium onion, sauteed in 1 teaspoon oil until very brown and grinded to a paste
1 bay leaf
3 pods cardamoms
3 cloves
2 table spoons ghee
Method:
Wash and soak rajma overnight. Drain and pessure cook adding the onion paste until just about soft, as you might be cooking this again along with the rice.
Wash the spinach well. Wash the rice and drain.
Roast the dry condiments and powder to a very fine texture. Keep aside.
Place your pressure pan or cooker on the stove, heat ghee in it. Add the bay leaf, cloves and cardamoms. Toss them for two minutes and drop the chopped onions.
Saute until the onions are translucent and add the drained rice with the salt. Keep tossing until the rice is shining.
Add to this the cooked rajma and the chopped greens. Add two cups of water. Cover and pressure cook until 1 whistle.
Allow the pressure to reduce. Open the lid and drop the powdered masala in. Mix well.
Serve hot with any raita.
This rice goes to Sunita's Think spice being hosted at Priya's easy n tasty recipes with
to
Indira's JFI event currently collecting Rajma @ Divya's Dil Se.


Healthcare - Important Chart

This was a mail forward from a friend. I wanted to share with all of you the benefits of certain foods we intake almost every day.
Hope the list actually works as it shows. Then may be we can balance our diets as per our needs.
Apples
Protects your heart, Prevents constipation, Blocks diarrhea, Improves lung capacity
Apricots
Combats cancer, Controls blood pressure, Saves your eyesight, Shields against Alzheimer's,
Slows aging process, Cushions joints
Artichokes
Aids digestion, Lowers cholesterol, Protects your heart, Stabilizes blood sugar, Guards against liver disease
Avocados
Battles diabetes, Lowers cholesterol, Helps stops strokes, Controls blood pressure, Smoothens skin
Bananas
Protects your heart, Quiets a cough, Strengthens bones, Controls blood pressure, Blocks diarrhea
Beans
Prevents constipation, Helps hemorrhoids, Lowers cholesterol, Combats cancer, Stabilizes blood sugar
Beets
Controls blood pressure, Combats cancer, Strengthens bones, Protects your heart, Aids weight loss
Blueberries
Combats cancer, Protects your heart, Stabilizes blood sugar, Boosts memory, Prevents constipation
Broccoli
Strengthens bones, Saves eyesight, Combats cancer, Protects your heart, Controls blood pressure
Cabbage
Combats cancer, Prevents constipation, Promotes weight loss, Protects your heart, Helps hemorrhoids
Cantaloupe
Saves eyesight, Controls blood pressure, Lowers cholesterol, Combats cancer, Supports immune system
Carrots
Saves eyesight, Protects your heart, Prevents constipation, Combats cancer, Promotes weight loss
Cauliflower
Protects against Prostate Cancer, Combats Breast Cancer, Strengthens bones, Banishes bruises, Guards against heart disease
Cherries
Protects your heart, Combats Cancer, Ends insomnia, Slows aging process, Shields against Alzheimer's
Chestnuts
Promotes weight loss, Protects your heart, Lowers cholesterol, Combats Cancer, Controls blood pressure
Chili peppers
Aids digestion, Soothes sore throat, Clears sinuses, Combats Cancer, Boosts immune system
Figs
Promotes weight loss, Helps stops strokes, Lowers cholesterol, Combats Cancer, Controls blood pressure
Fish
Protects your heart, Boosts memory, Protects your heart, Combats Cancer, Supports immune system
Flax
Aids digestion, Battles diabetes, Protects your heart, Improves mental health, Boosts immune system
Garlic
Lowers cholesterol, Controls blood pressure, Combats cancer, Kills bacteria, Fights fungus
Grapefruit
Protects against heart attacks, Promotes weight loss, Helps stops strokes, Combats prostate cancer, Lowers cholesterol
Grapes
Saves eyesight, Conquers kidney stones, Combats cancer, Enhances blood flow, Protects your heart
Green tea
Combats cancer, Protects your heart, Helps stops strokes, Promotes weight loss, Kills bacteria
Honey
Heals wounds, Aids digestion, Guards against ulcers, Increases energy, Fights allergies
Lemons
Combats cancer, Protects your heart, Controls blood pressure, Smoothes skin, Stops scurvy
Limes
Combats cancer, Protects your heart, Controls blood pressure, Smoothens skin, Stops scurvy
Mangoes
Combats cancer, Boosts memory, Regulates thyroid, Aids digestion, Shields against Alzheimer's
Mushrooms
Controls blood pressure, Lowers cholesterol, Kills bacteria, Combats cancer, Strengthens bones
Oats
Lowers cholesterol, Combats cancer, Battles diabetes, Prevents constipation, Smoothens skin
Olive oil
Protects your heart, Promotes weight loss, Combats cancer, Battles diabetes, Smoothens skin
Onions
Reduces risk of heart attack, Combats cancer, Kills bacteria, Lowers cholesterol, Fights fungus
Oranges
Supports immune systems, Combats cancer, Protects your heart, Straightens respiration
Peaches
Prevents constipation, Combats cancer, Helps stops strokes, Aids digestion, Helps hemorrhoids
Peanuts
Protects against heart disease, Promotes weight loss, Combats prostate cancer, Lowers cholesterol, Aggravates Diverticulitis
Pineapple
Strengthens bones, Relieves colds, Aids digestion, Dissolves warts, Blocks diarrhea
Prunes
Slows aging process, Prevents constipation, Boosts memory, Lowers cholesterol, Protects against heart disease
Rice
Protects your heart, Battles diabetes, Conquers kidney stones, Combats cancer, Helps stops strokes
Strawberries
Combats cancer, Protects your heart, Boosts memory, Calms stress
Sweet potatoes
Saves your eyesight, Lifts mood, Combats cancer, Strengthens bones
Tomatoes
Protects prostate, Combats cancer, Lowers cholesterol, Protects your heart
Walnuts
Lowers cholesterol,Combats cancer, Boosts memory, Lifts mood, Protects against heart disease
Water
Promotes weight loss, Combats cancer, Conquers kidney stones, Smoothens skin
Watermelon
Protects prostate, Promotes weight loss, Lowers cholesterol, Helps stops strokes, Controls blood pressure
Wheat germ
Combats colon cancer, Prevents constipation, Lowers cholesterol, Helps stops strokes, Improves digestion
Wheat bran
Combats colon cancer, Prevents constipation, Lowers cholesterol, Helps stops strokes, Improves digestion
Yogurt
Guards against ulcers, Strengthens bones, Lowers cholesterol, Supports immune systems, Aids digestion
7 Don'ts After a Meal
Don't smoke - Experiment from experts proves that smoking a cigarette after meal is comparable to smoking 10 cigarettes (chances of cancer is higher).
Don't eat fruits immediately - Immediately eating fruits after meals will cause stomach to be bloated with air. Therefore take fruit 1-2 hr after meal or 1 hr before meal.
Don't drink tea - Because tea leaves contain a high content of acid. This substance will cause the Protein content in the food we consume to be hardened thus difficult to digest.
Don't loosen your belt - Loosening the belt after a meal will easily cause the intestine to be twisted and blocked.
Don't bathe - Bathing will cause the increase of blood flow to the hands, legs & body thus the amount of blood around the stomach will therefore decrease. This will weaken the digestive system in our stomach.
Don't walk about - People always say that after a meal walk a hundred steps and you will live till 99. In actuality this is not true. Walking will cause the digestive system to be unable to absorb the nutrition from the food we intake.
Don't sleep immediately - The food we intake will not be able to digest properly. Thus will lead to gastric & infection in our intestine.
Hope some of these facts help us keep simply healthy!!

Friday, October 23, 2009

Oats Adai


Having read much about benefits of oats, I decided to try replacing the rice in adai with oats. I gave in to my whim, but did not want to overdo lest the attempt failed! I used the quantity that will make exactly 4 thick adais. And was bold to keep aside a portion of the batter to make vadais as in Thavalai vadai again entirely keeping the rice off.
The result was better than just good. The adais were soft unlike the rice dhal combination and the vadais were not oily at all.
I powdered coarsely the quick cooking oats, soaked dhals to grind coarsely, then added the powdered oats to the batter.
I added methi leaves, sliced onions, coriander leaves and sliced tomatoes to the adai batter, while I used only the onions and coriander, curry leaves for the vadais.
The adais had a tinge of sour taste as I had left it overnight to ferment.
There is no need for much fermentation, you will certainly get soft adais even if you keep the batter aside for few hours.


Ingredients:
Makes 8 adais
1 cup quick cooking oats
1/4 cup thuvar dhal
1/4 cup channa dhal
1/4 cup urad dhal
1/4 cup moong dhal
1 tablespoon soyabeans
1/2 tablespoon horse gram
2 table spoons fresh grated coconut
2 pieces spicy red chilli
2 pieces green chilli
1" piece ginger
Salt to taste
Other ingredients:
1 red onion sliced
1 medium tomato chopped
Fresh coriander leaves chopped finely
A fist full of methi leaves, retained in whole leaves
Few curry leaves chopped.
Oil for adais few spoons
What you need to do:
Wash the dhals well and soak together along with horse gram and the soya beans for an hour. Drain and grind to semolina consistency adding to this the ginger, chillis and coconut.
Powder the oats coarsely by pulsing your mixer few rounds.
Mix the two of the above well and add the salt.
Keep aside for about three to four hours.
Before making adais add the chopped vegetables and freshly chopped coriander leaves and curry leaves.
Mix well.
Place the tawa on heat and pour two big ladles full of the batter. Spread a bit. Pour oil around the edges.
Allow to cook and flip to the other side to cook well. Remove from tawa and serve hot.
Tomato sauce, any type of chutney or a lump of jaggery with some ghee can add to the taste!

I am sending these protien packed adais to Susan's Legume Love Affair whose Edition 16 is happening this month @ Cook Sister.


Friday, October 16, 2009

Kaju Burfi


This recipe was given to me by Kanthi maami, my cousin's mother-in-law. I have written down the recipe just as she had given us that makes twenty thin burfis. I had made with five times the given recipe this deepavali. I had made them slightly thick to obtain 50 pieces.

I have written this recipe down with the following as my notes -"Made this for Deepavali 1995. Should dry the kajus well or the powder may become sticky and form lumps" With that I give you the recipe for the yeild of 50 pieces.
Ingredients:
500 grams cashew nuts
250 grams sugar
5 tablespoons ghee
1 tablespoon ghee to grease the plate.


Dry the cashews in hot sun for two hours and powder them in a mixie or roast them over avery low flame,small quantities at a time without allowing to brown and then powder.
Alternatively, spread the cashews in a microwave proof flat dish and microwave on medium high at 2 minute increments without browning them. Cool and powder them in the mixie.
Grease the plate in which you intend to spread the dough with 1 tablespoon ghee.
Take 4 tablespoons of ghee in a heavy bottomed utensil. Keep this on low fire until ghee is almost smoking.
Drop the cashew powder and toss it for few minutes. Take off the fire and keep aside.
Make a one-thread consistency syrup of the sugar.
Gradually drop the roasted cahew powder, mix vigorously and quickly. Switch the fire off.
Stir contiuously blending them well, add the remaining ghee and as soon as the mixture starts leaving the sides, transfer the contents to the prepared plate. Spread well.
Allow to cool a bit before cutting squares of the burfis.
Cool on wired racks and lift the burfis off the plate. Store in airtight containers.
These will not be as soft as kathlis but will have the texture of mysorepauk or other burfis.


Thursday, October 15, 2009

Nylon Ribbon


Soon after I posted the ribbon pakodas, my sister, my good buddy and worst critic pointed out that they were extremely brown, not golden. i explained to her that I used the rice flour amma had brought from India and she had complained about the mill guy grinding wheat prior to grinding her soaked rice which resulted in anything fried using the flour get an extra dark tinge.

As the conversation carried on, she reminded me of this recipe. I promised her that I will make them asap, and I did, but before I took pictures, the crisp ribbons vanished just like that.

When she asked about it I told her that we both enjoyed them. I left it at that thinking I can do them again exclusively for the blog. Finally I made them this festival season and tried to make it suitable for vegans, replacing the butter by vegetable shortening.

Recipe for about 50 pieces is as follows:


Ingredients:
3 cups soaked, drained and powdered rice flour
1 &1/2 cup gram flour
3/4 cup finely powdered roasted gram (pottukadalai maavu)
10 pieces green chillis
2 inches long piece of ginger
3 tablespoons vegetable shortening (I used Dalda)
Salt to taste
Oil for deep frying
Method:
Seive the three flours together well, twice or thrice.
Grind the ginger and green chillis adding water. Strain this and add some more water. Keep aside.
Mix the salt to the flour, rub the dalda in thoroughly mixing well with the flour. Gradually mix the ground and strained chilli ginger flavours. Knead a smooth dough using more water if necessary.
Heat oil in a kadai and when oil is hot enough, using the murukku achchu fitted with the ribbon plate, press the ribbons directly in the oil. Deep fry till golden and crisp. Remove with a slotted ladle on to an absorbent tissue.
Repeat until all the dough is used up. Allow to cool a bit and transfer to an airtight container until further use.
As the flours are a bit more, it is recommended to divide into portions and mix the dough. Keeping the mixed dough for long will result in the murukkus getting a dark tinge.
I tried it this way for vegans.(There is a guarantee on tin of Dalda that no animal product is used in the manufacturing process) Butter can be used, but you might need more butter than dalda.
I hope you enjoy these crisp nylon ribbons.


Wednesday, October 14, 2009

Gulab-E-Aab from Khana Kazana


Last weekend when my husband opted to work, I busied myself with deepavali preparations. To rest my aching feet, I reclined on the sofa with the television on. Zee TV was showing a re-telecast of Sanjeev Kapoor's Khana Kazana. I watched the re-telecast of a show that might have been on during the fasting for Ramadhan.
Sanjeev created paneer ka slan, yakni pulav and this very delectable gulab-e-aab for his fasting viewers. The two vegetarian dishes made me vow to try them. I am planning to try the pulav his way with vegeatble stock replacing the meat stock. Well, that will no longer be yakni pulav I guess, but the way he explained indulges his viewers.
Coming to Gula-e-aab, it is rich as you will read the ingredients, filled to the brim with calories. But as Sanjeev puts it, it is something that you will need at the end of the long fasting day.
And I am only sending this to Srivalli who wants us to delight our kids while spicing our lives with her anniversary event Kids' Delight.


I will walk the extra calories out just to have this drink as I'm a rose milk addict.


What you will need: (serves two)
300 ml milk, boiled with some sugar and cooled
1 tablespoon sweetened khova or 1 piece rasmalai or 1 tablespoon kalakand
few blanched and chopped almonds
few pistachios
few strands saffron
2 teaspoons rose syrup (I used Real Value brand. Rooh Afza or Haldirams or any brand is good)
How you may proceed:
Boil milk and allow to cool.Ensure that the milk is cold or at room temperature. Mix the rose syrup well to the milk.
Crumble the kalakhand/ khova/ rasmalai into the rose milk.
Place the blanched sliced almonds and the pistachios on a flat micro-proof dish. Allow to roast for 1 minute on high micropower, just to remove raw taste.
In the same dish microwave the saffron strands for 30 seconds and crush them with your fingers.
Garnish these on the prepared gulab - e - aab.
Serve very chilled. Enjoy the rich and creamy rose drink.


Tuesday, October 13, 2009

Stuffed tomatoes and potatoes salad


I combined two salad recipes found in my microwave cookbook. Both the tomatoes and potatoes stuffed with fresh vegetables with some spice made a perfect starter for a meal with friends. It is your own choice filling that can bring about variety to the salad. You may use crumbled cottage cheese, cooked vegetables, sprout beans of your choice. I have used what was available in my refridgerator and created this salad.
You may require:
4 plum tomatoes, firm and round would be fine
2 medium potatoes
For the filling:
few teaspoons grated carrots
few pods of fresh or frozen green peas
1 small onion chopped
2 teaspoons moong dhal (yellow split lentils) washed and soaked in some water for 20 minutes
Salt to taste
Paprika powder as required
A pinch of Dry mango powder
How to proceed:
Cut a portion off the top of the tomatoes. Carefully scoop out the juice and seeds from inside. Retain this to fill the vegetables later.
Prick the potatoes with a fork at few points, peel a small area and adding some water, cook on micro power high for 4 minutes. Allow to stand for a further minute.
Remove the peel. Cut into two. Using a very sharp knife make a hollow in the middle of the four pieces.
(Alternatively you may boil the potatoes on stove top until you are able to remove the peel. Take care not to over cook them.)
Mix the ingredients for the filling with the potato pieces sliced off the centres and the removed tops of the tomatoes.


Fill this mixed filling into the created hollows.
Place these prepared toamtoes and potatoes on a flat microwave safe dish, brush some olive oil over the surface, cover with cling film and microwave on high power for 1 minute.
Garnish with chopped fresh coriander. Serve with onion rings or a yoghurt dip.
This salad is being sent to the September edition of No Croutons Required The store cupboard round hosted by Jacqueline.


I am sending this to MEC - Fresh produce hosted by Suma of Veggie Platter, the popular
MEC-Event initiated by Srivalli.


Monday, October 12, 2009

Rose flavoured maida cake

Have you ever wondered just a clap of thunder and a random song can bring back loads of memories. It does to me, of one fateful rainy October night of 1971. Our childhood home in Namakkal was in the then fashionable extension area of the town. Most of the houses were huge buildings built in the colonial era of 1940s, standing strong and tall.

In the beginning of seventies, there was one cinema house that came up about half a kilometre down the main road. We were able to see the bamboo construction of the touring theatre hall from our doorstep and with their loudspeaker system turned on, you had a audio soundtrack of every movie screened there. The theatre owners had decidedly thought that songs from Caravan and Kal aaj aur kal were superhits. These were played repeatedly at the start of show time and at intermissions, that we had them memorised and thought ourseleves pro in Hindi movie songs.

On this night of October, it was raining not so heavily but there was a standard drizzle with lightning and thunder intermittently. We were given dinner early lest the power supply fails and were instructed to study for the ensuing first term exams which we did sitting on the stone steps in the front of the house listening to 'piya thoo ab tho aa jaa' being played in the theatre. Down the lane my grand father was inspecting the construction work at a neighbour's house. My dad was away at Salem meeting a colleague and would return much later that night.

There was such loud clap of thunder preceeded by blinding lightning that fell like a flourescent carpet right from the heavens above. The supply of power died immediately. The noise of confusion arose from the theatre. Before I realised, I saw this projectile of fire moving towards the house, it deflected and struck the room where we had the radio. It deflected once again and earthed in the barn shattering a pillar.

No words can suffice to describe the confusion that followed. Least were we aware of the after effects until the next morning. The roof of our radio room had caved in as the ariel had tried to ground the striking thunder.

Worst was not over yet. As the heavens met the earth at our barn, Tiger, our Alsation mix breed had been blinded, deafened and had lost his loud barking voice. We were not prepared to put him to sleep though.

The dog outlived my grandad, for whom the shock of seeing his home in a devastation was enough to paralyze his right side totally and his left partially. He lived till the May of 1972 undergoing treatment and therapy. We kept Tiger as lovingly as possible until the day some six years later he died.

Everytime, the clap of thunder brings so much fear in me that it has become something near phobia and the song brings back these moments.

Now, this sweet today I made for deepavali is one that all of us make regularly but I followed the recipe that was done years ago by one Nagainallur cook hired specially to make this for a dinner we hosted for the members of Lions Club International.


Amma has written down the recipe and I have replicated it. Amazingly, her description of how the maida will cook like water drops falling steadily in a puddle of water and such worked while I made it today and helped me time it and bring out such a delicious sweetmeat for this Deepavali. Have a look at the picture of the dish and her notebook.


Recipe:

Ingredients:

2 cups maida/ all purpose flour

3 cups sugar

1 & 1/4 cup ghee

few drops of rose essence ( I used 2 teaspoons of Rose syrup)

Method:

Heat ghee in a kadai until smocking. Reduce heat and drop the maida in allowing it to cook in the ghee. The maida will bubble up in big bubbles in the middle with the 'pluck, pluck' sound of rain water dropping on an already formed puddle (literal translated description from my mom's note book). Cook for some more time , remove from fire. But keep stirring the mass regularly.
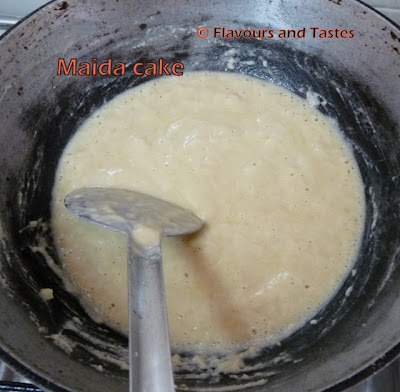


Keep sugar with some water added to it on the stove. Bring it to boil and without disturbing much, remove scum floating on the surface. Boil until a two thread consistency syrup has formed. You should be able to pull the sugar between your thumb and forefinger forming two threads. Allow the sugar syrup to boil a bit further but not so much that it becomes sugar. Add the essence to the sugar syrup.

Remove from the stove top. Add the maida sugar mix to this and stir vehemently until they blend well and thicken. The mass will now resemble a soft chappati dough. Transfer this to a prepared plate greased with two teaspoons of ghee and flatten with the back of a ladle.


Allow to cool for few minutes and using a knife, cut shapes of squares or diamonds.

The above recipe makes around fifty pieces and some edge pieces those are off-shape.

I would love to share my dose of nostalgia with IFR: Memories hosted by Manisha, of Indian Food Rocks


and this ghee sweet is packed off to Sanghi too who is relishing Fall-in-love season with Ghee.

The recipe is dedicated to my nephew Anirudh who is fond of the maida cake...though I'm not sure of the rose flavour in this.


Saturday, October 10, 2009

Making Khova for sweets

Deepavali is right around the corner and I am sure most of you are very busy shopping and preparing sweets and savouries. I started off my bakshanam galore yesterday with my usual Thirattippaal.

I am not sure why, but I will not deviate from this routine of thirattippaal being my first deepavali recipe every year without fail. I am very used to this recipe that I do it without measuring anything, not that it particularly needs accuracy! There are just two ingredients and what is so much to measure?

However, having started on it I decided I will measure atleast for blogging the correct measures. To my utter bewilderment, I realised my so called "standard cup" with 240 ml -1 cup labelled on it was neither 1 cup nor was 240 ml. first I decided I made a mistake, did it with the next pack of milk, Lo! same. I am pretty sure about my math and basic division. The milk measured more than 4 cups and was almost another half, whereas it should be few spoons full of the remaining 40 ml of milk. Whew! what I have been doing all these years measuring with this 'standard cup'?

That made me dig into my long unused utensils in a carton and bring out my all faithful aazhaakku measure (that is exactly 250 ml, I assure having ensured weighing water in it against the volume).

This also made me reflect about putting up some basics for Indian cooking. There are certain preparations that feature in most recipes like the unsweetened khova/mawa, the potato curry which takes as many avathars as filling, accompaniment and just a side dish, also there is the rice flour pounding, urad dhal roasting etc. So today I post the making of unsweetened khova which is a base recipe in dhoodhpedas, gulab jamuns, and so on.

It is very simple yet time consuming. To condense 2 litres (8 cups) of milk might be a process which will consume an hour and a half to two in time and as much equivalent fuel.
There are certain measures of caution to exercise too.

You should use a wide utensil, filling only near to the half mark. What we call the Malayala uruli, the heavy, wide,bronze utensil coated on the inner with an alloy of tin is best suitable. I use my heavy sandwich bottom pressure cooker. Using copper bottom is not recommended as copper conducts heat very fast.

The fire should be optimum. Keeping the fire very high might boil the milk over, while keeping it too low will result in the colour being rather brown than pleasantly pink-red.
It is also advisable to do it in 2 or 3 litres at one go.

Having said all this, I hope not to have put you off the idea of making khova at home. I can assure you, if you bear all this in mind, the process is very simple.


Take a suitable vessel. Run 1/2 cup of cold water around the inner walls and the bottom. Measure 8 cups of milk and put the utensil on fire. The heat can be at the maximum until the milk begins to boil.
Reduce the fire to medium, stir the contents, scrapping out what sticks on the walls of the utensil.
Allow the milk to simmer on this heat stirring occasionally but atleast at ten minute intervals, repeating the scrapping of the milk stuck to the walls.
Around an hours time the milk would have reduced to 1/2 of it's initial volume.
It will form a thick puddle with some solidified mass. Now on, keep the fire even lower and stir regularly to avoid this to stick at the bottom.
The fat in the milk will cause the mass to bubble and break. You have a thicker milk solid there. Bring the fire to the lowest. To protect your hand from blisters wear a kitchen gloves or cover your hand wrist down with some thick handkerchief while stirring.
Finally the milk will thicken and form a heavy mass that will no longer stick to the bottom. Switch the fire off and allow the condensed milk to cool in the same utensil.
The picture here shows the milk in various stages, taken at different intervals.
Remove and store until further use. Can be made ahead and refridgerated for upto three days.
This can be used for making dhoodh peda by mixing with it powdered sugar.
To make thirattippaal, add 3/4 cups of sugar at the point when you reduced the fire to the lowest. The sugar will initially melt to make the mass watery and then blend with the milk. Cook further until they blend well and thicken before switching the fire off.
The khova once ready can be used to make gulab jamuns by adding maida to it,makkhan peda, mohandhal etc. The varietiy sweets are more and every bit delicious.

Thursday, October 8, 2009

Kothumalli vidhai kuzhambu


If you enjoy the tangy tasting milagu kuzhambu or chettinad kara kuzhambu, you will certainly love this. It is one of my quick to cook kuzhambu that can be enjoyed with hot rice, idlis and dosais. It also has some shelf life like the pulikkaichchal and vattha kuzhambu which is an added advantage. I make karuveppilai kuzhambu too similarly. Just try this variation of the ever palate tickling kuzhambu too.
Ingredients:
2 table spoons (about 10 grams) coriander seeds
1 teaspoon black peppercorns
6 pieces hot, spicy variety red chillis
Tamarind the size of a small lemon
Salt to taste
3-4 tablespoons sesame seed oil ( any oil is optional, but sesame seeds oil tastes best in all these varieties)
1/4 teaspoon asafoetida powder
1/2 teaspoon turmeric powder
1 teaspoon mustard seeds
Few fresh curry leaves


Soak the tamarind in three teaspoons of water, just to soften it as you will be grinding the same unless you want the kuzhambu to be rarer.
If you prefer the kuzhambu thick, extract the pulp of the tamarind and boil the water until raw taste subsides before adding the spices that you have powdered.
Roast the coriander seeds, peppercorns and the redchillis without charring until very aromatic.
Blend all of the above to a thick smooth paste with the tamarind.
Wash the jar of the blender and add the water to the above extract. Add one more cup of water, salt and keep aside.
Heat the oil in a heavy kadai, temper the mustard seeds and curry leaves. Add the asafoetida powder and turmeric powder to the oil.
Reduce the heat and add the blended mix. Allow to boil and simmer until the extract reduces in volume to 1/3 rd of its volume and oil separates on the surface.
A very tangy tasting coriander seeds kuzhambu famously known as dhania kozhambu in Tamil homes is ready in approximately 20 minutes.
Store in stainless steel tiffin boxes or cool and store in bottles.
This recipe is specially made to be sent to my dear friend Priya's Think Spice Coriander event featured in Priya's Easy n' Tasty Recipes hosting this October the brainchild event of Sunita of Sunita's World.

Oat Raisin Cookies


These cookies are some I've been wanting to experiment with for some time. As with most South Indian homes our typical breakfast will be idlis, dosais and such. My husband puts in long working hours and feels cereals for breakfast will never suffice. While the Bahrain project was being set up, the office used to stock up some energy bars and soft drinks and juices along with coffee and tea making facilities. He had the energy bars there and found the pack on supermarket racks, which he encouraged me to buy. I loved the chewy texture and that is when on I wanted to try them at home.
My Betty Saw book has few chewy cookies but the ingredients invariably use eggs. Though I have cakes from bakers or friends, I can not relish if something smells of the eggs. Cakes don't seem to develop this but cookies with eggs will give off the whiff if stored over two days. I don't like buns that are given one eggwash to bring out the shine. This is totally my personal taste which neither my husband nor Niki seem to share :( My distaste for eggs developped after being force fed bull's eye while at boarding school, many years ago.
Going thro' recipes that feature in Madhuram's space with so many others presenting countless egg-free recipes, I ventured to modify one of Betty Saw's cookies. She had used mashed banana, which I was forced to replace by apple that was available that day in my kitchen. She had used one small egg which also was taken care of by the apple. Rest of the ingredients were from the recipe given.


These cookies were chewy and crisp on the first day, but softened by the next. I should be giving slight improvements, I guess. However, I give you the recipe and leave the rest to you. If anyone of you find a suggestion, I would love it.
Betty says "Pack these chewy cookies filled with bananas (apples, apply here) and raisins in your children's snack boxes...."
Ingredients:
(Drop cookies/ 15 minutes preparation/ 12-15 minutes baking/ yield 24 cookies)
60 grams butter
2 tablespoons golden syrup
1 medium ripe apple (I weighed 100grams of cut pieces) (peel, core and microwave for 3 minutes and mash coarsely)
125 grams quick cooking oats ( Betty used rolled oats; I've used the only oats is available here)
75 grams self -raising flour, sifted
2 tablespoons castor sugar
75 grams raisins
Method:
Line baking trays with non-stick baking paper.
Pre-heat oven to 180 degrees C.
Melt the butter and golden syrup in a sauce pan over low heat. Cool slightly and mix the rest of the ingredients to it.
Drop the batter in rounded teaspoonfuls, spaced apart on the prepared trays. Flatten slightly using a fork.
Bake for 12-15 minutes, just until golden.
Cool on wire racks before storing in airtight containers.
I'm sending these cookies to Madhuram's Whole -grain Baking Event which features Oats this October.


Wednesday, October 7, 2009

Eggless fruit cake

I baked this cake for my husband's birthday way back in July. Had followed Mrs. Geeta Narang's recipe from the LG Microwave cookbook. Just to add flavour to it I roasted some cinnamon sticks, powdered them and added to the original recipe. It tasted very good with all the cherries and raisins (I did not have raisins that day, So they seem to be missing here), could have been little less sweeter for me, but my husband loved the spongy, sweet and perfect cake with tea.
The recipe is very simple to follow. You can garnish with any icing, according to the author. But it was delicious by itself.


Ingredients:
(All cup measures are level 240ml, standard cup and proportionate)
1 cup plain flour/all purpose flour
1/2 cup sugar
1/2 cup butter at room temperature
1/4 cup whole milk
2 tablespoons raisins
2 table spoons glaced cherries
1 tablespoon honey
1/2 cup thick yoghurt
1/4 teaspoon bi-carbonate of soda
1/2 teaspoon baking powder
1 teaspoon roasted and powdered cinnamom
Method:
Pre- heat oven to 180 degrees C/350 degrees F/gas mark 4
Seive the flour with bi-carbonate of soda and the baking powder well.
Beat the butter and sugar until light, add the honey, yoghurt and fold the flour in gradually.
Grease a baking dish of size 7&1/2 inches square and pour the batter into it.
Bake for 30-35 minutes. Cool on wire racks for few minutes.
Enjoy the cake with coffee or tea.
This cake is what I'm carrying to the High Tea Patry @ Aparna's Diverse Kitchen where Meeta's Monthly Mingle is happening until the 15th of October.


This also goes to Srivalli who is celebrating blog anniversary with Kids' Delight until the 15th of October again @ Spice your Life.


Badam Halwa and Arisi Vadai - My 100th post!

I have been contemplating whether this is indeed a milestone post or not. The numbers mean as many recipes??? Well, nearly. I pat myself, aha! I can cook this many, great. But what these few months of blogging has given me is much, much more. It has been lovely and lively interacting with loads of blogger friends, some with a little more attachment and so on. It is worth celebrating then, don't you think?
To post a recipe to mark this was a task. There are a few posts to see the light of blog sphere, most of them are in pictures, write-up pending. So I took the suggestion of the two people who have been eating these most part of their lives...my husband and daughter. They came up with the idea of putting up something I cook and collectively we relish, which in itself is a difficult task. My husband used to be a pick and choose eater until recently. So it could have been a potato dish if he had his way. Niki is fine with most veggies and such. They came up with the two dishes for this post and here I am posting it for them.
Badam Halwa:


At home, when we were young, our grandmother and mother would indulge the three of us with different sweets prepared for different festivals. They used to make our choicest of the lot.
It used to be wheat halwa for Bhoghi, obbattu for Ugadi ans so on. Somehow, they never made badam halwa.
There was one Arya Bhavan near the Rajaganapathy temple in Salem. Appa used to buy this from there, just like bakes from Henry and Woolsey the famous bakers of Salem. The halwa used to come in tiny packets, wrapped in butter-paper, sweet and in a nice yellow colour. We love them.
Later I learnt from few cookbooks to make badam halwa.
Now this recipe works well for me and hope you will enjoy this too.
Ingredients:
1 cup almonds
1 cup sugar
1/2 cup milk (toned for low fat version)
Few strands of pure saffron
1/4 cup ghee
Method:
Soak almonds in hot water for about 20 minutes. Blanche them and using the milk grind to a fine paste.
Dissolve sugar in some water and boil until you achieve a thick syrup.
Mix the strands of saffron in some milk and dissolve them.
When the syrup consistency has been achieved, add the almond paste to it and stirring continuously allow it to blend well. Add the dissolved saffron too.
Cook the mix well adding the ghee in small portions until they come well together and start leaving the sides. Switch the fire off immediately. The halwa will still be semi solid but will thicken as it cools. Let the halwa reast in the same utensil for some minutes.
Transfer to a different container to store.
Garnish with roasted cashew nuts. You may also add cardamom powder for flavour but not necessarily.
Use of milk for grinding is optional, though that helps reducing quantity of ghee. Also as almonds have some fat content, ghee can be adjusted accordingly.
I usually serve this hot by heating small portions in the microwave.That makes it very indulgent, finger-licking good :)

Arisi Vadai:


This is the one vadai most of my mom's family memebers (my maternal grandma's daughters and daughters-in-law) make for Saraswathy pooja without exception.This is yet another very indulging dish from my grandmother's kitchen.
This year one of my cousin's wife, Priya manni sent this dish to Radio mirchi and won the first prize!!!
My mother makes them coin size and we just grab in fistfulls no end! We had our friend over for dinner the night of this year's Saraswathy pooja and he tried to take these with rice instead of vegetables:) I guess that I have piqued your interest enough that I should get to the recipe now.
Ingredients:
2 cups rice flour ( prepared by soaking rice and pounding it; you may use store bought flour too)
2 level cups water
2 tablespoons thuvar dhal
1/4 cup yoghurt
3 tablespoons fresh coconut, scrapped finely
6 green chillis
1 tablespoon channa dhal
2 teaspoons mustard seeds
few fresh curry leaves
2 teaspoons oil for tempering
Salt to taste
Oil for deep frying
Method:
Soak thuvar dhal for an hour, drain and grind coarsely along with coconut and chillis.
Soak channa dhal in some water for some time. Drain and keep aside.
Heat the oil for tempering in a heavy bottomed kadai, temper with mustard seeds and curry leaves. Add the channa dhal and toss for two minutes before adding the water.
Add the yoghurt, salt and the thuvar dhal paste, stirring well.
When this starts boiling, reduce heat to lowest and add the rice flour. Blend them well to form a lump that a small portion of it rolls between your fingers.
Take off the fire. Cool and knead well to obtain a lump-free, smooth dough. Make small balls and flatten them like discs. Small and medium thin discs that do not crack at edges should be the correct texture. You might sprinkle some warm water if necessary, but exercise caution, more water results in oily vadais.
Heat oil in a kadai and deep fry the prepared discs over medium heat, turning them around. Remove with a slotted ladle once the vadais are crisp and golden brown.
These vadais will stay crisp for few hours turning soft and chewy later. But both ways they taste just as good.