Showing posts with label Kuzhambu/Sambhar. Show all posts

Monday, June 29, 2020

Pachcha Maanga Sambhar

Living in a gated community has, among other many benefits, the interaction with like minded people and more importantly, sharing experiences, ideas and food.  There are days when I am wondering what to cook for lunch or even breakfast, the solution comes from a neighbour who brings a bowl full of something, a variety rice or side dish. Sometimes the number of dishes are so many, that I save them in the refrigerator. As of now, inside my fridge are a variety of thokkus ,preserved chutneys and pickles from few of the people who put delicious food on their table everyday.
We have quite a few mango trees in the compound which are of different varieties of mangoes. Thus, come March, these trees yield fruits in different stages of ripening. One of our neighbours shared two tangy raw mangoes one day and asked me what I would be using those for, other than making a pickle. I requested her to suggest a recipe and she shared this Pachcha Maanga Sambhar. I made it the same day and we liked it very much.  The following is the quick recipe that is a good side dish to go with hot, steamed rice.


Pachcha Maanga Sambhar.
(vegan and seasonal recipe)


Ingredients:
Serves 2 people

1 medium raw mango (sour mangoes are best)(otherwise use a tablespoon of tamarind extract for sourness)
1/2 cup thur dhal (pressure cook to soft and mash)
2 teaspoons sesame oil (any cooking oil)
2 teaspoons sambhar powder
2 green chillis 
1/4 teaspoon turmeric powder
1/4teaspoon asafoetida powder
1/2 teaspoon fenugreek seeds (optional)
1 clove garlic crushed (optional)
Salt to taste

For tempering:
2 teaspoons sesame oil
1 teaspoon mustard seeds
2 sprigs of curry leaves
 

Method:
Cut the mango in big chunks. Use the stone also in cooking.
In a pan add 2 teaspoons of oil. When the oil is moderately hot, add turmeric powder, asfoetida powder, fenugreek seeds, garlic, slit green chillis and salt. Saute for a minute or two.
To the above add sambhar powder and 2 cups of water. Let it boil for about 10 minutes.
Once the raw  feel of ingredients has subsided, add the mango. Bring to a boil. Do not let it boil for long. The mango has to hold shape and let the  sourness blend with the liquid.
Add the cooked dhal and bring it all to a boil. Switch the heat off.
In another pan heat the oil for tempering.
Add the mustard seeds and let the crackle.
Switch the stove off and drop the curry leaves.
Add the tempering to the sambhar.
Serve with hot steamed rice.
 

Note: If the mango is not sour enough and you are adding tamarind extract, boil the extract in the first stage itself.

Monday, June 11, 2018

Poondu Mandi Kuzhambu - Spicy Garlic Gravy

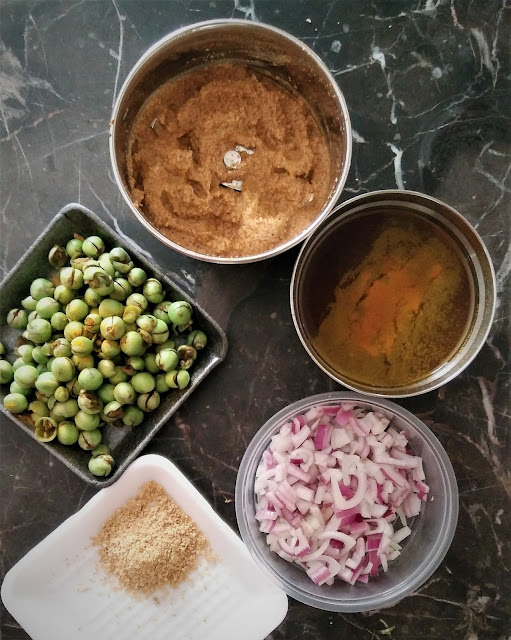
On our recent visit to our daughter, we chanced to have lunch in an Indian restaurant that listed many Chettinad type of dishes in their menu. While we all ordered, the staff who served tried to detail to us about their dishes. I had then wanted to try their Poondu Kuzhambu that he suggested to have with steamed rice. That tasted very good and they willingly adjusted the spice level to our liking. Their serving portion was quite large and we packed the same with us.
This was a unique preparation that uses charred tomatoes as base and the water we usually discard after rinsing rice, the 'mandi' or 'kazhuneer' (as in rinsed starchy residue from cleaning rice) to tcook the gravy.
We liked it so much that we wanted to try making the same at home. I checked with a few friends who are from Chettinad, for the recipe. One of them guided me to a blog that had authentic Chettinad style poondu kuzhambu, but it was not the same. I found a video of the preparation, which was nearly the same; it had shallots in the recipe, which was not in the dish we had tasted. I then formulated my own recipe for the kuzhambu and tried to replicate the dish that we had tasted in the restaurant. I share that here today. This may not be an authentic recipe from the region, but a delicious dish, nonetheless.


Mandi is the residual water while rinsing and cleaning rice. Give one brisk rinse in the first round, not removing much starch away. Wash your second and third rinses thoroughly getting as much starch residue as possible. You need to collect this rinse in a bowl. The residue of rice starch will settle on the bottom of the bowl. You may not need all of the water. Carefully, strain some liquid without pouring away the 'mandi’. I will refer to this liquid (kazhuneer) as mandi in the recipe.

Poondu Mandi Kuzhambu


Ingredients:
(makes 400 ml medium thick kuzhambu/ served us 4 good servings)

15 cloves of garlic
3  medium tomatoes
(if possible, char the tomatoes over a low flame and remove the charred skin. Not compulsory, but the taste is enhanced. I used the roti jali as mine had small perforations) (otherwise sauté the tomatoes in a pan to a coarse pulp)
1 medium red onion sliced finely
1 &1/2 cup +1/4 cup mandi (divided)*
2 tablespoons gingelley oil / nallennai
1/2 tablespoon coriander powder
1/8 teaspoon turmeric powder
2 tablespoons raw peanuts (optional and you may replace by cooked chick peas)
Salt to taste

Grinding spices:
Soak in the *1/4 cup mandi the following for 10 minutes and then grind to a paste using the mandi (you may use some more from the 1&1/2 cups, if needed)
4 cloves garlic
4-5 dry red chillis (depending on heat of the chillis) (the kuzhambu is a slightly spicy dish)
1 small gooseberry size tamarind ( if the tomatoes are too sweet, up this a little)

While grinding, half way through, add the coriander powder and the tomatoes. Grind them to a smooth, thick liquid pulp. Keep aside.

Tempering:
 1/2 teaspoon cumin seeds and curry leaves ; no mustard seeds are added
(since the cumin seeds are added in the beginning, it does not require extra oil)
Method:
Heat the oil in a heavy bottom pan. Add the cumin seeds. Toss a bit and add the cloves of garlic and sliced red onion. Sauté until onions are  transparent.
Add the peanuts (or chick peas)
Stir the mandi to mix the sedimented rice starch to a uniform liquid.
Add salt , turmeric powder and 1 cup of the mandi, cover and cook until the garlic are soft.
Add the ground pulpy mixture, adjust the liquid by adding some more mandi.
Simmer the kuzhambu for about 15 minutes so the raw taste of garlic, tamarind and red chillis in the liquid subside. 
Add the rest of the mandi and cook further  until the kuzhambu has thickened.


Add the curry leaves and chopped fresh coriander leaves to garnish.
Serve with hot steamed rice or as a side dish for Dosais and Idlis. This kuzhambu can be kept over and had for another day also. If refrigerated it can be kept for up to three days. To reheat, you may add some more of the rice rinsed water or plain water which will thin the consistency a bit.

Wednesday, August 16, 2017

Ready To Make - Moar Kuzhambu - Powdered Mix

Sometimes when I travel and my husband has to manage his meals, I try to make it easier for him to fix something, lest he skips his meal. I had tried part cooking and freezing foods which seemed quite handy. Then he found that if I post instructions, that might help him cook a few dishes. Thus, my counter top and refrigerator door would be filled with notes. He had managed very well that he would even grind his batter, make dhal and sambhar.
While I wrote some recipes for my daughter, she still had to juggle time with the demanding coursework and assignments; it was getting harder to cook something elaborate. Soon both of my nephews were also going away from home and were left to manage cooking for themselves.
It was then, my mother tried to coax us to make some ready to cook meals ideas. We had found that making the packaged dosa, upma mixes were easy to make at home. It took us some trials and misses to make them have longer shelf life. Thus, our puliogere ready mix and adai mix took shape. Little more experimenting lead to moar kuzhambu mix and  an 'all - in - one - sambhar mix'. This moar kuzhambu mix is a very quick dish that you cook the vegetable and mix this powder to the whisked curd. Give it a boil and add some tempering. So easy!

Update: (Updated on 7th May 2018)
This powder stays fresh over a year even at room temperature. We had made this batch last year in May and I had carried with me a portion. i just finished my last tablespoon full ready mix powder today.

Ready To Make - Moar Kuzhambu - Powdered Mix

Ingredients:
Makes 5 standard cups of powder
200 ml / heaped 3/4 cup+1 tablespoon fresh grated coconut
125 ml / heaped 1/2 cup raw rice
250 ml / heaped 1 cup / 250grams pack channa dhal / Bengal gram / split chickpeas
250 ml / heaped 1 cup / 250 grams pack thuvar dhal / split pigeon peas
70 ml / heaped 1/4 cup cumin seeds
30 ml/ 2 tablespoons coriander seeds
16 -20 dried green chillis* (1&1/2 inches long and slightly high on heat)
60 ml / level measured 1/4 cup salt
5 ml / 1 teaspoon asafoetida
About 1/3 cup dried curry leaves**

Method:
*To get dry green chillis, wash them, remove the stem and pat them dry. Spread them on a very flat dish / paper / cloth and leave them to dry for a few days. Once they are dry, they become brittle, but the green colour is just about faded. They stay well for over a month and will retain the spice level.

** The curry leaves can be dried after separating them, washed and spread between layers of cloth in the sun. Or you may choose to oven roast dry leaves until they are brittle.

To make the powder, dry roast over a low the coconut until the moisture is gone and the coconut is dry. Do not roast it to turn shade over the white. transfer to a dish and allow to cool.
Then dry roast separately over low - medium heat  the dhals, rice, coriander seeds and cumin seeds until they are just about hot. Take care that they do not over roast. (When grinding for moar kuzhambu normally the ingredients are soaked and ground raw, so we do not over do the roasting here).
Transfer them to another dish.
Finally roast the sea salt until it turns pink and transfer to this dish.
Allow them all to cool.
Pulse all the said ingredients leaving out the coconut until they are a coarse powder, add the coconut and grind further to a powder that is not very fine.


Cool this and store in airtight containers. You may refrigerate this powder if the quantity is more. Usually, the mix stays well for two moths outside of refrigeration.

To make Moar Kuzhambu:
2 tablespoons of above powder
3 - 4 tablespoons thick, slightly sour curd
Vegetable of choice
2 teaspoons ghee /coconut oil for tempering
1/2 teaspoon mustard seeds
Few fresh curry leaves and fresh coriander leaves

Cook the vegetable and keep ready.
Mix the powder to the curd and whisk to blend them. Add another 1/3 cup of water.
Add the cooked vegetable and bring the moar kuzhambu to a boil.
Remove from the stove.

Heat the ghee / coconut oil in a small pan and add the mustard seeds. Allow them to crackle and add the tempering to the moar kuzhambu.

Let the kuzhambu cool down a bit before adding the curry leaves and the coriander leaves.
Enjoy the kuzhambu with steamed white rice or as a side dish for ven pongal.


Sunday, July 9, 2017

Sundaikkai Gothsu - Turkey Berries and Onions Stew

It had been many years ago that I may have last tasted some of the vegetables that we had often been given in our childhood and until little older too. Most times greens, spinach and few other vegetables were grown in the home garden. Some yielded abundantly and my grandmother would share with the neighbours. They encouraged us to help around; we have helped making trellis for the beans and spinach, water the plants and such.The home patch yielded few varieties of vegetables that were locally easy to grow and many flowers. It now seems like ages ago and I had lost touch with such pleasures. Once we had a huge turkey berry plant and I remember that my mother cooked the berries in a stir fry kind of dish with lot of coconut and condiments.
When we set our house in Coimbatore, we laboured a bit and have a garden to show. The area has fertile soil and hence the garden thrives. few of the neighbours have fruit trees and flowering plants all in their glory. One of them has the turkey berry planted nearer to their front wall and thus as we pass by we get to see bunches of them in the plant. They have generously shared those with any of us who would cook them.
During the few months, I slowly settled in, the neighbours have pampered me to the point of being spoilt. Sometimes, most unexpectedly, someone would send me piping hot food just so I can cook only rice and such. That was when one of them sent me this tangy and spicy stew. It was lip smacking, finger licking delicious.
You might well imagine my delight when the other evening I spotted in the shop assistant's trolley these small packs of these berries labelled green eggplant. I read up later that these are the same family.


I picked up one pack and soon as I reached home, I shot a message to the lady to share her recipe. She promptly messaged the next morning and I waited for today to cook them.
I was chatting with my mother and gave her the small details in the recipe. she then informed me that her grandmother would cook the berries in similar dish adding her touch. That has to be another day and post to share that.

Sunadaikkai Gothsu
Recipe: Mrs. Padma Balu, my neighbour 


Ingredients:
Serves 4

1 cup / 250 ml Turkey berries/ Sundaikkai
1 cup finely chopped onions
6 tablespoons thick tamarind extract
Salt to taste
1/2 teaspoon turmeric powder
2 tablespoons coriander seeds
1 teaspoon cumin seeds
6-8 dry red chillis
4 tablespoons fresh coconut scrapes
1&1/2 teaspoon powdered jaggery
1&1/2 teaspoon white sesame seeds
3 tablespoons gingelley oil or any cooking oil (divided)
2 teaspoons mustard seeds
Few fresh curry leaves
Coriander leaves ( I did not have any, so had not added)

Method:
Wash the turkey berries, place them in a plastic bag and give a few vigorous taps with a rolling pin. Alternately, place them in a stone mortar and crush the berries. they will break open and few seeds will be strewn. transfer the berries to a colander and clean wash the seeds away under running water.
In a heavy pan, dry roast the sesame seeds until golden brown and they start to pop. Cool and make a fine powder. Keep aside.
In the same pan dry roast the red chillis, cumin and coriander seeds until well roasted.
Add this to the coconut and grind to a slightly coarse paste. Keep aside.


Keep reserve about 2 teaspoons of the oil for the tempering. Add the rest of the oil to the cooking pan and heat. When the oil is hot, add the sliced onions and the berries. Cook them until the onions are transparent and the berries change to a pale green colour. Add the salt and turmeric powder and cook a bit longer.

Add the tamarind extract and cook on low flame until the raw taste of the tamarind subsides.
Add the jaggery and let it cook fora further 3 minutes.
Dilute the ground paste with some water and add to the stew.
Mix well, adjust the water and cook until a thick gravy is obtained.
Transfer to a serving dish.
To temper heat the reserved 2 teaspoons oil, add the mustard seeds and allow them to crackle. Toss the curry leaves and add the tempering to the gothsu.

 
Sprinkle the roasted sesame powder on top. This enhances the flavour.
Garnish with curry leaves and coriander leaves if you have  them.
serve the hot gothsu with steamed rice. It makes a good side for adai and venpongal also.


Saturday, April 18, 2015

'Call it what you may' - Coondapur Spice Powder and the Thengaipaal Masala Kuzhambu

As a newly wed, I pictured myself  learning all dishes that my mother-in-law might cook and pick up skills. Such plans flopped as there was always a routine kind of cooking in the household and even on special days most things remained standard. This was because my mother-in-law had taken ill at a young age, the family took to eating simple meals that was easy on her - to cook and to digest. However, there is one 'special' kuzhambu that will be cooked when guests were around or on days neer dosa or shavige were the meal option.
It was an exercise that both my parents-in-law will take on and kind of make it an elaborate affair that I was in awe. My part was just to slice several onions that will go into the kuzhambu. It was a simple dish wherein she would toss the onions in oil and add a special spice powder and cook in thick coconut milk. I have tried checking if she made the powder herself, for I did not think that they ever bought it. She used to get in bulk from her sister and family and store very carefully and use frugally. I did not ever get to pick it up, thus. By way of conversation, she mentioned that one of her sisters had a recipe that she was making the powder in bulk. Now, I grabbed the chance to request her to get the recipe for me which she obliged. I scribbled it down while she dictated over the phone. The irony is that I  had the recipe listed as "Coondapur Powder" in the instruction manual cum cookbook of my old Sumeet mixer grinder. I just did not relate the recipe to my mother-in-law's birth town :) . I still call it Sumathi chikkamma powder after the aunt who shared the recipe. Call it what one may, this is a flavour packed spice powder that enhances the coconut milk's taste. For records, I shall keep it Coondapur Powder and the thengaipaal kuzhambu with the spice mix.
I usually do not add garlic to the powder as I can add or omit when I make the kuzhambu. The original recipes add the garlic while the spice mix is made and stored. I have added the garlic in this write up as an option.


Coondapur Powder
(Recipe as given by my mother-in-law's sister)
Ingredients:
Makes  approximately160 grams powder without addition of garlic and 200grams if garlic is added.
(I have given in weights and in volume)

50 grams/500 millilitres Byadagi variety dry red chillis (for deep red colour and moderate heat level)
40 grams/ 125 millilitres coriander seeds
40 grams/ 60 millilitres (heaped to make approximately 62&1/2 millilitres) black pepper corns
20 grams/  1/8 cup +1 &1/2 tablespoons cumin seeds
10 grams/ 1 tablespoon fenugreek seeds
4 grams/ 1 teaspoon turmeric powder
40 grams. 2  numbers large size whole garlic pods (optional)


Method:
Add few drops of castor oil or any cooking oil to the byadagi red chillis and roast them until brittle. Transfer to a flat dish and spread.
Dry roast, on medium to low flame, separately, the coriander seeds, black pepper corns, cumin seeds and fenugreek seeds until they waft aroma.
Transfer to the same dish and allow to cool.
Add the turmeric powder.
If you are using garlic in the powder, peel the garlic and ever so slightly toss it in the heated pan for a few minutes. The original recipe grinds the garlic raw with other ingredients.
Allow to cool a bit and blend the roasted ingredients to as fine a powder as possible.
Do not over grind if you are adding the garlic as the powder may become sticky lumps.
Use this powder in any masala gravies just as you may add garam masala.

Thengai paal Kuzhambu with Coondapur Powder
Serves 4


Ingredients:
4 large red onions sliced very fine and/or any vegetable of your choice
(I have used potatoes, turnips, carrots and tomatoes one or combined)
2-3 green chillis chopped
1 tablespoon cooking oil
1 cup thick coconut milk
1/2 cup second extract of coconut milk
1 and1/2 tablespoon Coodapur powder
5 cloves of garlic
( Additionally you may use whole spices like cardamom, cloves, bay leaves and cinnamon for extra flavour)
Salt to taste

Tempering:
2 teaspoons cooking oil
2 teaspoons mustard seeds
2 sprigs curry leaves
5 shallots peeled and sliced fine

Method:
Heat the oil in a heavy pan. Add the sliced onions, garlic (other spices, if using) and chopped green chillis. Saute' until the onions are very pink and shiny.If you are using other vegetables, cook them first and then add them to the above.
Drop in the spice powder and toss then add the second extract of coconut milk. add the salt and cook for a while.
Pour in the thick extract and cook on a low flame until the raw taste subsides and the coconut milk thicken in a gravy.Take care not to curdle the coconut milk by over cooking.
Remove from the fire and transfer  to a serving dish.
Heat the oil for tempering in a pan, add mustard seeds. Once they crackle add the sliced shallots and toss until they are crisp. Drop the curry leaves and toss few more seconds. Add this to the kuzhambu.

This kuzhambu ideally pairs as a side for neer dosa, shavige and ghee rice.


Tuesday, June 17, 2014

Mampazha Moar Kuzhambu

Yes it is, the mango mania continues! It seems that I am trying out as many possible recipes before the fruits are off their season. There has been ice cream and aam shrikhand at home, not to mention eating fruits raw and making juice and yoghurt.
It was when I made and shared the maanga pulisseri that Jayashree had suggested that I try the same with ripe mangoes. I intended to, but wondered if I might have a recipe to follow, as these were not regular fare in my home. Almost three years down the line, I found one to make and write a post about too. This time I had a recipe that had received much acclaim from friends of whom had made this recipe - a second cousin, whom I met at a wedding last year, and since contacted.
I had this update on facebook, a picture of few friends who had met for lunch, and my cousin had made the mampazha moarkuzhambhu, for them. There were rave reviews that it piqued my interest. I was hesitant at first to write to her, but my curiosity won. She was very kind to mail me the recipe within minutes and also had no issues that it goes on my blog. So here it is : cooked at home and enjoyed with steaming hot rice.


Mampazha Moar Kuzhambhu

Recipe shared by Mrs. Jayanti Hariharan
Serves 4 people


Ingredients:
2 medium sized mangoes
2 cups curds
1/4 cup ash gourd/ winter melon cut pieces
1/8th teaspoon turmeric powder
1/2 cup freshly grated coconut
3 green chillis (adjust according to heat of chillis and taste)
3 dry red chillis (adjust according to heat level of the chillis and taste)
Salt to taste

For tempering:
2 teaspoons cooking oil
2 teaspoons mustard seeds
1 teaspoon fenugreek seeds
2 sprigs curry leaves
1-2 dry red chillis

Method:
Wash and cut the mangoes in three - stone and both sides in full.
Place the mangoes and the cut ash gourd pieces in separators and pressure cook them until two whistles.
When the pressure inside the pressure cooker has subsided, remove the gourd pieces, add some salt and the turmeric and keep aside.
Allow the mango to cool. Remove the outer skin and stone. Grind the pulp until smooth.
Take about two tablespoons of the curd and set aside.
Churn the rest of the curds adding little water as necessary.
Mix the mango pulp to the churned curds well to combine and the resultant is a very smooth liquid.
Grind the coconut, dry red chillis and green chillis to a smooth paste adding the curd that you set aside, and not adding water.
Add the coconut paste to the mango-yoghurt mix. If you find this too thick, add some water.
Place a heavy bottom pan/ kadai on the stove. Heat the oil in the pan and add the mustard seeds. When they crackle add the fenugreek seeds, curry leaves and the red chilli. Put the cooked ash gourd pieces in.
Add the kuzhambhu to the above, required salt to it and lower the flame. Allow the kuzhambhu to simmer on low heat, stirring at regular intervals until desired consistency is reached. Do not allow the kuzhambhu to boil. The kuzhambhu has to retain a smooth consistency and not having clots of broken curd.
Remove from the heat and transfer to the serving dish.
Serve with hot steamed rice.

The kuzhambhu is to be slightly sweet. So you may add a teaspoon of sugar if your mango is not sweet enough.
The mango I had was fibrous and upon pressure cooking the fibre had separated, which I used a strainer and removed before adding the pulp to the churned curds.
Also I cooked the kuzhambhu after tossing the fenugreek seeds in little oil and made the tempering later.
My cousin had added that she had not given exact measures and went with eyeballing measures. I followed the same and I am glad that our measures matched largely. The dry chillis I have in my pantry are quite heavy on heat. So I have had to reduce the number of chillis in the grinding.
I hope you will also try the same and enjoy.


Tuesday, February 12, 2013

Karuveppilai poondu kaarakuzhambhu

Sometimes deciding the menu for the day's cooking is a challenge than the actual task itself. We are just two people and hence if I try to make a variety, most times we have left overs. So I limit my everyday cooking to one gravy dish to go with the rice and two vegetables side dishes. It is harder that you try not to repeat the same vegetable dish in the course of the week. The vegetables that I include most of the days are tomatoes and onions.
Garlic is not usually cooked in my parents' home. They do not buy garlic at all and if we plan to cook some dish with garlic, we go borrow from our neighbours. Here also, I do not stock garlic, but sometimes the vegetable shop assistant will throw in one or two  pods free of cost, if I request. The second time I baked the pull apart bread, I took with me some garlic from the shop and had some left along with my onions. To use them up I made this kaara kuzhambhu.


This kuzhambu was some random idea in my head and I worked the recipe with stuff I had on hand and some I wanted to use up. Sometimes, those dishes taste best when you did not plan for it. This was one such dish and to share a post, I cooked it again.
Bharathy's Spicy Chilly is celebrating the blog anniversary this month and she has announced her first event throwing in a give away from CupoNation. Check her post for details. I wish to send this spicy dish for the event.
Ingredients:
100 grams shallots/  pearl onions
1 whole pod of garlic -about 15-18 cloves
150 grams/ 2 medium tomatoes
1 cup fresh curry leaves
5- 7 dry red chillis
1 tablespoon coriander seeds
1/2 teaspoon fenugreek seeds
1/4 cup thick tamarind extract
1/2 teaspoon sambhar podi
1 teaspoon powdered  jaggery
Salt to taste
2 tablespoons ginglley oil/sesame seeds oil

For the tempering and garnish:
1 teaspoon cooking oil
1/2 teaspoon mustard seeds
1 dry red chilli
2 sprigs fresh curry leaves

Method:
Peel the onions. Retain some of them as whole. Chop the rest.
Peel the garlic and retain as whole.
Chop tomatoes and press them hard with your hands. Keep aside.
Heat 1 teaspoon of the sesame seeds oil. Roast the curry leaves until they are crisp. Transfer to the jar of a spice grinder.
In the same pan, dry roast the coriander seeds and then the red chillis until the chillis are brittle.
Add the roasted chillis and coriander seeds to the curry leaves. Grind to a fine powder. Keep aside.
In a heavy bottom pan, heat the rest of the oil.  When the oil is hot, add the fenugreek seeds and the whole shallots and cook until they are puffed well and almost browned. Add the peeled garlic and sauté. Remove them with a slotted ladle and keep aside.
Drop the chopped onions in the hot oil and cook them until they are very transparent. Add the chopped tomatoes with the liquid. Cook until they are well pulped. add the salt and the tamarind extract. Add about 1/2 cup water and allow to simmer.


Put the sambhar powder and the powdered jaggery. Cook until the gravy is thick enough.
Finally add the powdered spice mix and the roasted onion and garlic. Adjust the water and cook to a slightly thick gravy.
Remove from the stove.
Place a pan with the cooking oil on heat. Add the mustard seeds and allow them to splutter.
Drop in the red chilli and toss until the oil coats the chilli. Then add the curry leaves and allow them to fry a bit.
Temper the kuzhambu with the above.
Serve the kuzhambu with hot steamed rice.

Generally the  pulikuzhambu,and  kaara kuzhambu are best made with stone ware utensils or the iron wok. I have made it with my iron wok. However, it still will taste good with regular cooking utensils too. Tomatoes are my additions and thus I have reduced the tamarind quantity. If you choose to not add tomatoes, increase the tamarind pulp by another 1/4 of a cup.
This kuzhambu can be had as a side for dosais too.


Saturday, January 26, 2013

Podi potta sambhar and the varuththa sambhar podi

During our middle and high school years we were fed rice three times a day. Our mornings typically started with a health drink. Just before leaving for school we had hot steamed rice with the vegetable and either sambhar or rasam though both were cooked regularly. We did not have the breakfast schedule, but when we came back in the evening there would be something heavy for tiffin. Idlis and dosais were made on particular days that our grand parents and / or parents had them for their night meal. Chutneys were also not mandatory accompaniments. The milagai podi and sambhar from the afternoon meal would suffice as accompaniments.
Only when I moved to college the breakfast schedule started. And has been until now. But since my husband leaves really early, making an elaborate breakfast happens rarely. But he will not have cereals either. I make 'tiffin' for the night and keep it light, meaning fewer in number if it is idlis, dosais and chappathis. But we both like to have proper accompaniments with those. Thus I make different chutneys and sambhar, vegetable gravies.
The milagai podi is supposedly staple, but out of sheer laziness, I did not make it for very long. Then my friend Niv put up a status about making podi. That night I made my stock, this time a new recipe from my sister, which will be a post here soon. Then another friend Finla was making dosa. That conversation lead to some sambhar discussion and I promised to post the recipe. my mother never made a separate recipe for podi potta sambhar and would make it with her rasam powder. But I have seen many people keeping the two different powders. I had few recipes from various sources and have been making them just to try them out. I have even bought the commercially available powders.

This recipe for the powder is from S.Meenakshi ammal book and the sambhar I am sharing today is also adapted from the same, but altered to suit our tastes, bringing the heat a little lower.


Recipe for the Sambhar Podi:
source Samaiththu Paar Book 1 by S.Meenakshi Ammal
Yield : 100 gram sambhar powder

Ingredients:
165 ml/35 grams dry red chillis (part chillis were byadagi variety for deep red colour)
125 ml/35 grams coriander seeds
2 teaspoons /5 grams black pepper corns
1/2 teaspoon turmeric (whole broken in bits) (or you may use 1 teaspoon turmeric powder)
1 teaspoon /6 grams split bengal gram/ channa dhal
30 ml / 15 grams split pigeon peas / thoor dhal


Method:
Dry roast each of the above separately and on low heat in a heavy pan until chillis are brittle,and the other ingredients are well roasted.
If you are using turmeric powder, you may add it to the powder later.
Cool and grind to a powder.
Store in clean glass bottles and use as needed.
Stores well for months together.
These are measures are given in the cookbook and I have weighed and measured in a cup with multiple markings -in teaspoons, millilitres, ounces and tablespoons. But they need not necessarily be exact; a slight variation does not affect the aroma or taste.


I make this in small quantities.
The recipe in the book was with 10 times the one above. Usually back home people grimd these in the commercial mills and stock.
If you plan to make a larger quantity, you may store in ziplock bags in the refrigerator/ freezer.

Podi potta sambhar (sambhar made using the above powder)
This sambhar is usually not thickened, but is quite well combined with a rarer consistency. I prefer this for my idlis and dosais. To thicken this, a teaspoon of rice flour mixed in water is added to the sambhar when it has boiled well. It is quickly stirred in and removed from heat soon after. But I prefer to add a tablespoon of coconut milk. as it enhances the flavour and texture. 


Ingredients:
Serves 4 
One big lemon size ball of tamarind, soaked and pulp extracted
75 grams split pigeon peas/ thoor dhal
1/4 teaspoon turmeric powder
1/4 teaspoon fenugreek seeds
1 drop of oil
2 teaspoons sambhar powder (above recipe)
Salt to taste
1teaspoon rice flour (if you need a thick sambhar)
1/4 teaspoon asafoetida powder
 Any vegetable of choice to be added to the sambhar ( Potatoes, capsicums, brinjals, drumsticks and onions are well suited)

Tempering:
2 teaspoons cooking oil
1 teaspoon mustard seeds
3 - 4 dry red chillis broken in bits of two
1 green chilli slit in half lengthwise
2 sprigs fresh/ dried curry leaves

Method:
Depending on the vegetables of choice cook them accordingly. Keep aside.
Wash the dhal and pressure cook with one drop of oil, the fenugreek seeds and turmeric powder. The dhal shall be cooked to very soft and slightly mashable.
Soak tamarind in water and with few repeats extract the pulp. You may, in all need 250 ml of water.
In a pan, add salt to the tamarind extract and bring to a boil, then simmer. Add the sambhar powder and the boiled vegetables.
Cook for a few minutes and finally add the dhal.
Allow to simmer and thicken a bit.
If the sambhar needs to thicken add a then paste of rice flour in water  to the simmering stew. Allow to come to a quick boil and remove from heat.


If you like the taste of coconuts in your cooking, you may add some coconut milk to the sambhar.
Take the sambhar off the heat.
Heat the oil in a small pan and add the mustard seeds. Once they crackle, add the red chilis and the green chilli. Toss for few seconds and then add the curry leaves.
Transfer the tempering to the sambhar.
Serve the sambhar hot with idlis, dosais or hot rice.

Wednesday, October 3, 2012

Pachcha Sambhar - Right out of my mail box to table

Can you comprehend that this post  has been possible because of a discussion thread on facebook?
I opened my facebook to see Aparna 's status message about the 150th edition of the Saveur magazine. That triggered a very long discussion on Sambhar the staple in many South Indian homes.
This thread had so much input from many of us and some interesting insight into how our mothers and grandmothers had used their own techniques and fine tunings to sambhar. We even discussed how it is pronounced and much more. In all that was a very interesting discussion to follow even if you were not a participant.
In the course of the thread food writer and cookbook author Ammini Ramachandran suggested this sambhar she had shared in her book.
I do not have a copy of her book Grains, Greens and Grated Coconuts. So I simply requested her to share her recipe which she was kind enough to oblige.
I have copied her message and shared here verbatim. Now read on in Ammini's words the recipe.


"Hi Lata,

Here is the recipe for pacha sambar.It is a light version, does not taste exactly like sambar. Look forward to your verdict after you try it.

Thanks,
Ammini


Pacha Sambar: Sambar with Fresh Green Spices

Sambar is a staple curry of South India. It is always served with rice and often served for breakfast. Pacha (“green” in Malayalam) sambar is a version prepared only with fresh spices. In this curry, not only must the vegetables be fresh, most of the spices are also green (not dried). For tartness, many curries rely on tamarind; here, it comes from lemon juice.

Ingredients:
1 cup tuvar dal
1 medium russet potato or 3 taro, peeled and cubed
2 medium tomatoes cubed
Salt to taste
½ teaspoon turmeric powder
¾ cup finely chopped cilantro leaves
¼ cup finely chopped fresh fenugreek leaves (preferred, if available)
or ½ teaspoon ground fenugreek
6 fresh green chilies (serrano or Thai), thinly sliced (less for a milder taste)
4 tablespoons lemon juice

For seasoning and garnish:
2 tablespoons vegetable oil
1 teaspoon mustard seeds
1 dried red cayenne, serrano, or Thai chili, halved
¼ teaspoon asafetida powder
20 to 25 fresh curry leaves

Wash and clean the tuvar dal in several changes of water, until the water runs clear. If you are using oily tuvar dal, the oil must be washed off before starting to cook.
Place the tuvar dal in a saucepan with two and a half cups of water and a half-teaspoon of turmeric powder. Bring it to a boil over medium heat, then turn down the heat, and cook for twenty-five to thirty minutes. (As an alternative, you may use a pressure cooker to cook the dal, following the manufacturer’s directions. It will take about six to eight minutes to cook in a pressure cooker.)


As the dal cooks, it should be fairly thick but still liquid; stir in another half-cup of water if it is too thick. Mash the cooked tuvar dal thoroughly with a spoon, and set it aside.
Combine the potato (or taro), tomatoes, salt, turmeric, and two cups of water in a saucepan over medium heat, and bring it to a boil. Stir in the cilantro, fenugreek, and green chilies. Reduce the heat, and cook until the potatoes are fork tender. Stir in the cooked tuvar dal, and simmer for four to five minutes. Stir in the lemon juice. Remove it from the heat, and set it aside.
Heat two tablespoons of oil in a small skillet, and add the mustard seeds. When the mustard seeds start sputtering, add the halved red chili, asafetida, and curry leaves. Remove it from the stove, and pour the seasoning over the cooked curry. Cover and set aside for ten minutes, to allow the flavors to blend. Serve hot with rice."

I had all the ingredients on hand only had to substitute the chillis with the locally available ones.
I am thankful to Ammini for sharing a wonderful dish recipe and for all of friends on facebook who made this possible to learn a new dish.

Tuesday, July 3, 2012

Pedatha's Greens in Yogurt - what shall I say of this Culinary genius?


Months ago I was the lucky draw winner of Siri's Healing foods event hosted that month by Simone of Briciole with Whole Grains. I received a copy of Cooking at Home  with Pedatha signed by authors Jigyasa Giri and Pratibha Jain. I had promised to use the book and also share my thoughts. I dare not suggest that i would write a review of the book for I am just an insignificant entity who pale against the culinary expertise of Pedatha.
Since August of 2011, when I received the book, I have been cooking often from the book and have tried almost 65 percent of the recipes with the guidance therein. I can confidently say that none of them have failed to inspire and leave you happy that you tried something wonderful.
The book is just a glimpse into a genius' world of cooking. Pedatha's knowledge and expertise are incomparable. She takes you through the recipe in small steps as though she were present around you while you are trying the dish, just as your grandmom or an elderly aunt would help.
The authors have categorically listed the dishes that will feature in any South Indian home cooking and added tips and thoughts from Pedatha which are very useful and the variations that can work just as well with many recipes.
In all whether you cook for just yourself or for guests having this book for guidance, you will certainly receive praises.Wonderful everyday cooking book that is a pride to own by food lovers.
I would love to share one dish I tried more often than others in today's post.
To begin with, I had this tiny amaranth plant in one of my pots that would yield a bunch just enough for cooking a greens dish for one lunch for two. And for my husband to have greens they have to be cooked with much care that he will not complain. This particular recipe was unique and I had not tried prior to reading in this book. It tastefully combines greens, legumes and yogurt in a delicious gravy that goes well with steamed rice. And with the vegetable of your choice, you have a complete meal.

Akukoora majjiga Pulusu - an unusual and tasty dish from rural Andhra Pradesh:

The recipe has been tried from the book Cooking at home with Pedatha, the text has been modified in my words, though the essence of the recipe remains.

Ingredients:
Thuvar dhal 1/2 cup
Channa dhal 1/2 cup
Amaranth greens chopped fine 1/2 cup
Thick Churned yoghurt 3 cups
Thick extract of tamarind 1 tablespoon
Turmeric powder 1/2 teaspoon
Asafoetida powder 1 teaspoon
Green chillis slit 3 numbers
 Curry leaves 1 sprig
Coriander leaves chopped fine 1/2 cup
Ghee 2 - 3 tablespoons
Oil 3 tablespoons
Salt as required

To grind in a paste
Fresh coconut grated 1/2 cup
Ginger 2 inch piece
Coriander leaves chopped fine 1/4 cup
Green chillis 3 - 4 numbers

For tempering:
Mustard seeds 1 tablespoon
red chillis 6 - 8 nicked at tail with stalks retained


Method:
Cook both dhals together in 3 cups of water to a very soft consistency. Add 1/2 a cup more of water and churn well and set aside.
Grind all the ingredients listed for the paste to a very fine paste, using little water. Mix this paste with the churned dhal mix and keep aside.

In a pan heat, oil and add the mustard seeds. Allow them to pop and add the red chillis. Fry until they turn bright and add the washed and chopped greens. Cover and cook until the greens are cooked well.
Add the tamarind extract, turmeric, asafoetida and the salt. Simmer for a few more minutes. add the dhal and paste mixture, green chills, curry leaves and coriander leaves. Continue to cook for a couple of minutes longer.
Finally remove from the heat and stir in the ghee and yoghurt.
Serve with hot steamed rice.


Saturday, November 26, 2011

Karuveppilai kuzhambu ready mix powder


I usually make a few 'almost ready to eat' type of dishes for my husband whenever I travel. He finds it hard to eat out every meal. Earlier he may not have wanted to cook for himself, but lately he is happy to have rice with a simple rasam or upma and such. My refrigerator door will be filled with 'post it strips- instructions' for him. I partly cook some dishes and freeze in individual packs like stuffed parathas, roast the vermicelli, onions and microwave the vegetables and so on.

Likewise my mother and one of my aunts have lot more 'pack and carry to wherever you live' ideas for us. For instance, I find it hard to buy fresh curry leaves off the grocer sometimes. My mother's garden has an abundant supply that people in our street just walk in and take bunches for their needs.

Amma would pluck them, clean and dry in shade for me to pack with my other groceries. I store that in bottles and use them. Though this might not match the taste of fresh leaves' they are good enough. The Egyptians will store mint in a similar fashion. Hence my pantry stocks up such leaves too, and my deep freezer will always have a supply of few cut and boiled vegetables for emergencies.

When my daughter started her own cooking in the university, along with rasam powder, paruppu podi etc., my sister's mother-in-law prepared this kuzhambu podi also. It is so easy to make karuveppilai kuzhambu with this powder; just mix in warm water and bring to a boil with some oil added in the start of the process and the kuzhambu is ready to eat.

That recipe is what I am sharing here. The regular recipe for making karuveppilai kuzhambu with fresh curry leaves and spices can be read in an earlier post.

This makes about 200 ml powder which might last a while for you only need two teaspoons for one cup (200ml) of water which will boil and reduce to about 170ml kuzhambu.

Ingredients:
2 cups Fresh curry leaves
100 -120 grams Urad dhal
50 grams Thoor dhal
15 Dry red chillis
1 tablespoon Black pepper corns
2 teaspoons Cumin seeds
1 big lemon size ball of Tamarind
3 teaspoons Sea salt (if using table salt, adjust accordingly)
1 teaspoon Asafoetida powder
1 teaspoon Turmeric powder
1 tablespoon powdered Jaggery
2 teaspoons Oil

Method:
Dry roast separately the two dhals until golden in colour and an aroma wafts from the roasting.
In the hot pan add the salt and roast it until very warm. Tear the tamarind in small bits and toss it n the same pan with the salt for about 5-7 minutes.
Heat the oil and roast the red chillis, pepper and cumin.
Remove these and add to the roasted dhals and the other roasted ingredients.
On a low flame, toss the curry leaves until they wilt and become brittle.
Allow all the roasted ingredients to cool.
Transfer the ingredients, saving the curry leaves and the jaggery to the bowl of the spice grinder and pulse until they are coarsely powdered.
Add the curry leaves and grind further until a fine powder is achieved.
Finally mix the jaggery in this.
Cool well and store in clean glass jars.


To prepare kuzhambu:
In one cup of very warm water dissolve two teaspoons of the powder and mix well without lumps.
Heat 2 tablespoons of gingely oil in a pan. Add some mustard seeds and allow to crackle.


Pour the above mix and cook until the mixture boils and simmer for a further few minutes.
Serve with hot steamed rice, dosais or arisi upma kohukkattai and paruppu adai.

I made this now because I am on a longer holiday with my daughter and my husband gets back to work in order to accommodate his colleagues who are heading home for Christmas.

Wednesday, November 9, 2011

No 'moar'-kuzhambu and eating vegan through a day


'What is there to change in a South Indian diet when most of it is nearly vegan' is what my husband commented as I discussed the idea of staying vegan through a day. I had to convince him to join in, you see. I listed out the dairy that we use on a regular basis and I could see that I might be losing his support.
Eventually, we agreed upon a menu, I suggested then that I will serve him black tea (for green tea would have put a full stop to the plans then and there). He chuckled thinking of the teas he might have at work, and agreed. To coax him enough, I made puri and kizhangu for breakfast and neer dosa for dinner! Having set that, I worked though the lunch where I had my trump card for him!
The one thing I had forgotten was the morning tea! Which household in our regions does not wake up to a steaming hot filter kapi or a blissful cup of chai? However, he was a good sport and had the black tea without fuss.
Thus a Saturday of cooking and eating vegan was otherwise novel. I had not thought it would be easy to forgo 'nei' and thick home set yoghurt even for a day!
I had earlier made the vegan cashew yoghurt from Harini's post and used in the Badami mixed vegetables recipe. The yoghurt had set so well and tasted very good that I used other ingredients to set yoghurt - peanuts once and coconut milk a few times.
The method I used was always the same; warm the coconut milk until moderately warm and drop about 15 chilli crowns in it and allow that to work. Initially, I had, without knowledge, used the second extract and found that the yoghurt was not as thick as I would like it to be.
With a few trials, I learnt that while the chilli crowns are indeed a good option, setting this with a bit of other vegan set yoghurt, for instance the cashew yoghurt, expedites the process. This yoghurt set in about five hours on warm days. I had planned to use this yoghurt and try the regular moarkuzhambu that uses a fair amount of churned yoghurt as key ingredient.
Having made up my mind on that, the lunch menu was also set : Vendaikkai vathakkal kari, vegan moarkuzhambhu, steamed rice and a kootu which uses a base of legumes (a recipe, I thought will help just in case my husband is not inspired to eat a vegan moarkuzhambu).


I have not posted the poori-kiazhangu until now; (I am making a mental note of that). Neither have I discussed vendaikkai vathakkal kari, other than from Aparna's recipe for a days' lunch. All of these will be posted in the near future.
However, today's star recipe is the 'Vegan moarkuzhambu'.

Ingredients:
1/2 cup/125ml preset coconut-milk yoghurt (recipe discussed below)
Salt to taste
1/4th teaspoon turmeric powder
1/4th teaspoon asafoetida powder
Suitable vegetable cuts of your choice (I used brinjals)

Grind the following to a paste:
1 teaspoon split bengal gram / channa dhal
1/2 teaspoon thuvar dhal
1/2 teaspoon coriander seeds
1 teaspoon cumin seeds
1 teaspoon raw rice kernels
3 large green chillis
Soak these in a small amount of water for a few minutes and grind to a smooth paste.
I skipped the usual addition of fresh grated coconut as the yoghurt already has a fair portion of the same.

For garnish:
2 teaspoons coconut oil (or any cooking oil)
1 teaspoon mustard seeds
1/4th teaspoon cumin seeds
Few sprigs curry leaves
Chopped coriander leaves (if available)

Method:
Setting coconut milk yoghurt:
Take one cup of first extract coconut milk in a bowl. Warm this on a moderate flame until the milk is warm. Do not boil the milk.
Remove from the stove and drop about 15 numbers fresh chilli crowns in the same.
Set this in a warm place and leave undisturbed for about six to eight hours.
The coconut yoghurt will set. Remove the chilli crowns and discard.
You might notice that the thicker yoghurt like substance is floating over some watery mass below. But do not worry. Stir the same and you have your yoghurt ready.
You may use, if you have on hand, some vegan yoghurt to set this and not use chilli crowns.
However, expect that this yoghurt does not set as thick as dairy yoghurt; nor it has the rich creamy flavour of the cashew/ almond yoghurt. You might sense a slight tinge of coconut oil also, if your coconut has been very mature. But this blends well while cooking and adds to the flavours. You will be surprised that this has a nice slightly sweet taste while it also has enough tang that makes it suitable to use in such dishes.
I have used it in aviyal the following day and carried for a potluck. My guests did not find it different, until being told that it was vegan.


Use 1/2 cup of this yoghurt for the moarkuzhambu.

Method for the moarkuzhambu:
Cut the vegetables that you are using in the kuzhambu.
Take the vegetable and turmeric powder in a pan with water and cook the same.
Meanwhile prepare the paste as listed in the grinding.
Add about 100 ml water, asafoetida powder and salt to the paste.
When the vegetable has become tender, add the above and cook on a medium flame until the mixture thickens. Stir off and on to avoid forming lumps.


When the mixture has cooked well with all the raw tastes subsiding, add the coconut yoghurt.
Reduce the flame a bit and allow this to come to a boil. Reduce the heat to the lowest, simmer just for a few seconds and switch the stove off. Over heating will curdle the coconut milk.
Heat the oil for tempering in a pan. Add the mustard seeds and cumin seeds. Once they crackle, toss the curry leaves in the same and add this to the kuzhambu.
If you have fresh coriander leaves, wash them and add chopped leaves to the above.


We did not detect that it was a non-dairy kuzhambu at all. It was just as good as the usual yoghurt based recipe. In fact I had an unexpected guest who found it hard to believe. That success gave me confidence to prepare aviayal with the coconut yoghurt for about a dozen others. Needless to say that was largely welcome too!

Added to the vegan cooking, that day as I had completed one reading of the Sundara Kandam, I prepared a no milk badam kheer (recipe is my next post) and urad dhal vadas for the evening.
A night's dinner with neer dosa and thakkali-vengayam chutney made a whole day of keeping off non-vegan products.

Harini is hosting a giveaway through the 12th of November. She had set this challenge and I wanted to join in. Thus this post came by and a thoroughly intriguing day long vegan meal. There is an interesting guest post by Preethi and Srinivas of Krya -creating vegan awareness in Tongue Tickers. Please have a look and I am sure you will also want to try the challenge, like I did.

Wednesday, October 19, 2011

Milagu vellam


There are certain dishes that bring you back memories from a distant past or sometimes a recent past. When it rains quite heavily, I will be reminded of two very 'rain-day special' dishes, that our aunt (father's brother's wife) used to quickly make for us. One of them is 'moarkali', a gluey mass of pounded rice cooked in yoghurt and spiced. It is such a thoroughly enjoyable feeling to take small portions of the moarkali, while still very warm and try to swallow, still wanting to savor in your mouth.
The other dish is the milagu vellam. This has such a peppery warmth that will soothe you when the outside weather is dark and gloomy.
It was an everyday practice at our home that curd will be churned and butter extracted. For the afternoon lunch we would have thick set curds while with the night dinner only the fat-removed buttermilk was served with rice. There will be so much buttermilk that we can have a second helping to drink with salt and asafoetida added to the same.
So it was quite often that moar kuzhambu, rawa dosai and yoghurt based dishes were prepared at home. My mother made the milagu vellam once in a blue moon, so to me that was a luxury that Hema chitti had pampered us with. That was one of the recipes I copied from my mother's note book early when my cooking expedition had started. I would not wait for a rainy day to have it.

This recipe has another anecdote to go with it, which is more recent and importantly more relevant. It was the recipe that gave me a chance to start a conversation with Jayasree some two years ago. She has this recipe in her archives. I was reading most of her earlier posts and when I read this I found that her recipe was slightly different and she had not added any picture. I chanced to find her online and we discussed this. I suggested she add a picture and both of us made a pact that we would post our versions with the picture. It did not transpire to date and will never happen in her blog anymore.

My daughter has added her thoughts here. It goes to prove that regardless of the age, Jayasree had endeared herself to many of us.

"Isn't it amazing how, somebody that met you but twice, can have a profound impact on your life? Jayasree was one of those people in my life. I remember hearing so much about her from amma, and got to meet her for the first time at her home in Palakkad. She was so cheerful and full of smiles, that she brought out the chatter-box in me in no time at all. I have met her only once after that - this past august, at their home in Pune, during my summer break. I remember Jayasree telling amma that we did not get to spend enough time together.. how true she was.... it has indeed been far too short.
The life lessons I got from my interactions with this wonderful person are numerous. She taught me acceptance, in her cheerful love for everybody she met, she taught me optimism, in her ready smiles and her positive outlook.. and most importantly, I believe, she taught me simplicity.. in the way she drew joy and contentment from small everyday things.
This lovely woman is no more, but the hearts she has touched are numerous, and I count myself blessed to have gotten the chance to know her. Her memory will forever be with me, and her thoughts will always put a smile on my face. I pray that God give her family the strength to go through this difficult time and that she rest in peace."


Getting to the recipe now. This can be done with less than five ingredients that can be easily available in the pantry mostly and cooked in under 30 minutes. This dish combines well with hot steamed rice and any vegetable stirfry can be had as a side or even crisps work well.

You can eye-ball the measures usually. However, I give the list of ingredients, that can be adjusted according to individual taste.

Ingredients:
100 ml fat removed buttermilk (fresh or the previous day's will work well)
1 teaspoon gram flour/ besan
1/2 teaspoon freshly ground black pepper
1/4 teaspoon turmeric powder
Salt according to taste

Tempering:
1 teaspoon Ghee (preferred to oil)
1 teaspoon mustard seeds
Few fresh curry leaves


Method:
In a bowl add one cup of water to the turmeric powder and the pepper powder.
Place on a high flame and once the water boils, reduce the heat and allow to simmer for a good 12 to 15 minutes until the pepper blends and the volume of liquid is almost half.
Mix the gram flour to the buttermilk well free of lumps.
Pour this to the simmering pepper water. Stir continuously and bring it to a near boil stage.
Over boiling will curdle the mixture.
Switch the heat off, but do not remove the bowl from the stove top. Keep stirring for a further 5 minutes.
Remove from the stove top and stir again. You will have a moderately thin kuzhambu ready.
Remember that you have not added the salt until this stage?
Allow the milagu vellam to cool to room temperature. Stir in the salt and mix well. (Salt is added to the end to avoid any curdling, that results in milk proteins and water being separated.)
Heat the ghee in a pan and add the mustard seeds and the curry leaves for tempering. Add the crackled mustard seeds and roasted curry leaves to the milagu vellam.
When you have a few spoons of this, you will feel the warmth travelling through the throat and then food pipe. Pepper has medicinal properties, which probably is the reason to have it when the outside weather is prone to bring infections.